Showing posts with label applique. Show all posts

31 August 2022

August 2022

 The knitting/crocheting for Project Linus continues. 


This blanket was knit using 2 skeins of Lionbrand  Cupcake in the colorway Diagon Alley. I really like how this turned out using the variegated baby yarn.


This blanket was crocheted using a one pounder of baby blue yarn that I purchase from a thrift store. I used a stitch that I found in a stitch dictionary.

I finished this quilt. Finally! It is a vintage kit quilt that included everything except the batting and backing. This is the second kit like this that I've completed and I hesitate to say that I won't be doing another. The blue dye that is used on these for the cutting lines and quilting lines does not totally come out. But, all-in-all I am pleased with the results. It is hand appliqued and machine quilted.


28 April 2016

I made this one to work on that one

I made this brightly patterned pinwheel quilt with it's alternating applique posy blocks just so I could practice my quilting on applique.


Yes, those are yo-yos in the center of the posies. I wanted something to use to practice the quilting around applique before I went on to this lovely block of the month quilt. When I get this finished, I'll tell you all the trials and tribulations of this quilt.


29 June 2013

Camping

Camping is very hazardous to bedding. I spent some time at the laundromat yesterday using one of the large commercial machines to wash the two old sleeping bags. You know the kind: thick and heavy with the flannel on the inside. These two bags are getting quite thin on the outside and I have patched and patched and patched them. The fabric has been caught in the zippers so it was time once again to patch them. I dug around in the 2.5" strip bin and found a strip of orange that matches the outside. The holes are now covered with an appliqued patch, the bags are folded and back in the camper.

Also on the agenda today was the duvet cover for the old duvet that is kept in the camper. Now how did it get a triangular tear? shrug.


There, all fixed. And, yes, it is pink.


29 May 2013

Dissappointed

I just got a quilt back from a long arm quilter and I am disappointed in it, to say the least. This was the Block of the Month in 2010 from The Quilt Show. This quilter only did half the job! I was wondering why it was so cheap and now I know.

Do you see what DIDN'T happen? The appliques were not ditch quilted. In fact, the swags needed a bit of quilting inside of them. I love what she did in the negative spaces but she fell short on the others.

It is fixable and I am going to do it myself on my DMS. I am saddened about this and I even discussed what I wanted for this quilt, but she apparently didn't listen very well. I doubt that I will be using this quilter again.

27 May 2013

Well, the applique is done

This quilt is a very long-term project. The applique is done, woohoo! In fact, the painting and colored pencils are done too! What was painted, you ask? Well, the stars seemed to blend into the background because the values were too close. So out came the Jacquard Lumiere paint and a flat tipped brush. Using a dry technique, the paint was put on the edge and pulled in toward the center of the star. Some turned out better than others.


Next up, is quilting and I will have to think on what I want to do with this. I am thinking just a simple straight line or grid, but I don't know yet. Do you believe I have been working on this since the end of June 2012?

What's on your design wall? For more eye candy, visit Judy's Patchwork Times blog.

06 May 2013

Design Wall Monday - May 6, 2013

Apparently, I am not happy unless there are multiple projects going. This is how the studio looked when I closed the door yesterday. In fact, I stood in the doorway to take these photos.
 
In the lower left of this photo, the counter that doubles as a cutting surface is visible with the next border of the Baltimore Christmas BOM ready to stitch on it. Beyond that, is the old Singer treadle machine currently being used for string piecing. The foundation papers are sitting to the right of the machine and just on the back corner of the treadle cabinet is the growing stack of 'blocks'. As a string gets pulled from the basket, it will be sewn to the foundation paper, unless it is a longer red or blue one as evidenced from the growing pile on the floor of a future QOV string quilt.

Behind the treadle is the Bernina that is set up for the machine applique of the Baltimore Christmas BOM. I don't want to mess with the settings, that's why I'm using the treadle at the moment. And there is the pile of the purple knitted jacket waiting for the hand-stitching of the frog closures to complete it. On the back corner, is the box of fabrics used in the Baltimore Christmas BOM.

 
Progressing a bit further around the room, the hand quilting frame becomes visible. It is currently in use as a hanger for six (6!) basted quilts awaiting quilting. The oak rocking chair is blocking the view of a small side table that currently holds a hand piecing project and just go to this post for the design wall that is behind the rocking chair and hasn't changed in a while.

And there you have the state of my studio. Did you keep track of the projects? If you didn't, the number is 12.

22 April 2013

Inner Border On


There's nothing like taking your time to do something correct. It took two days to get that first border on. Why?

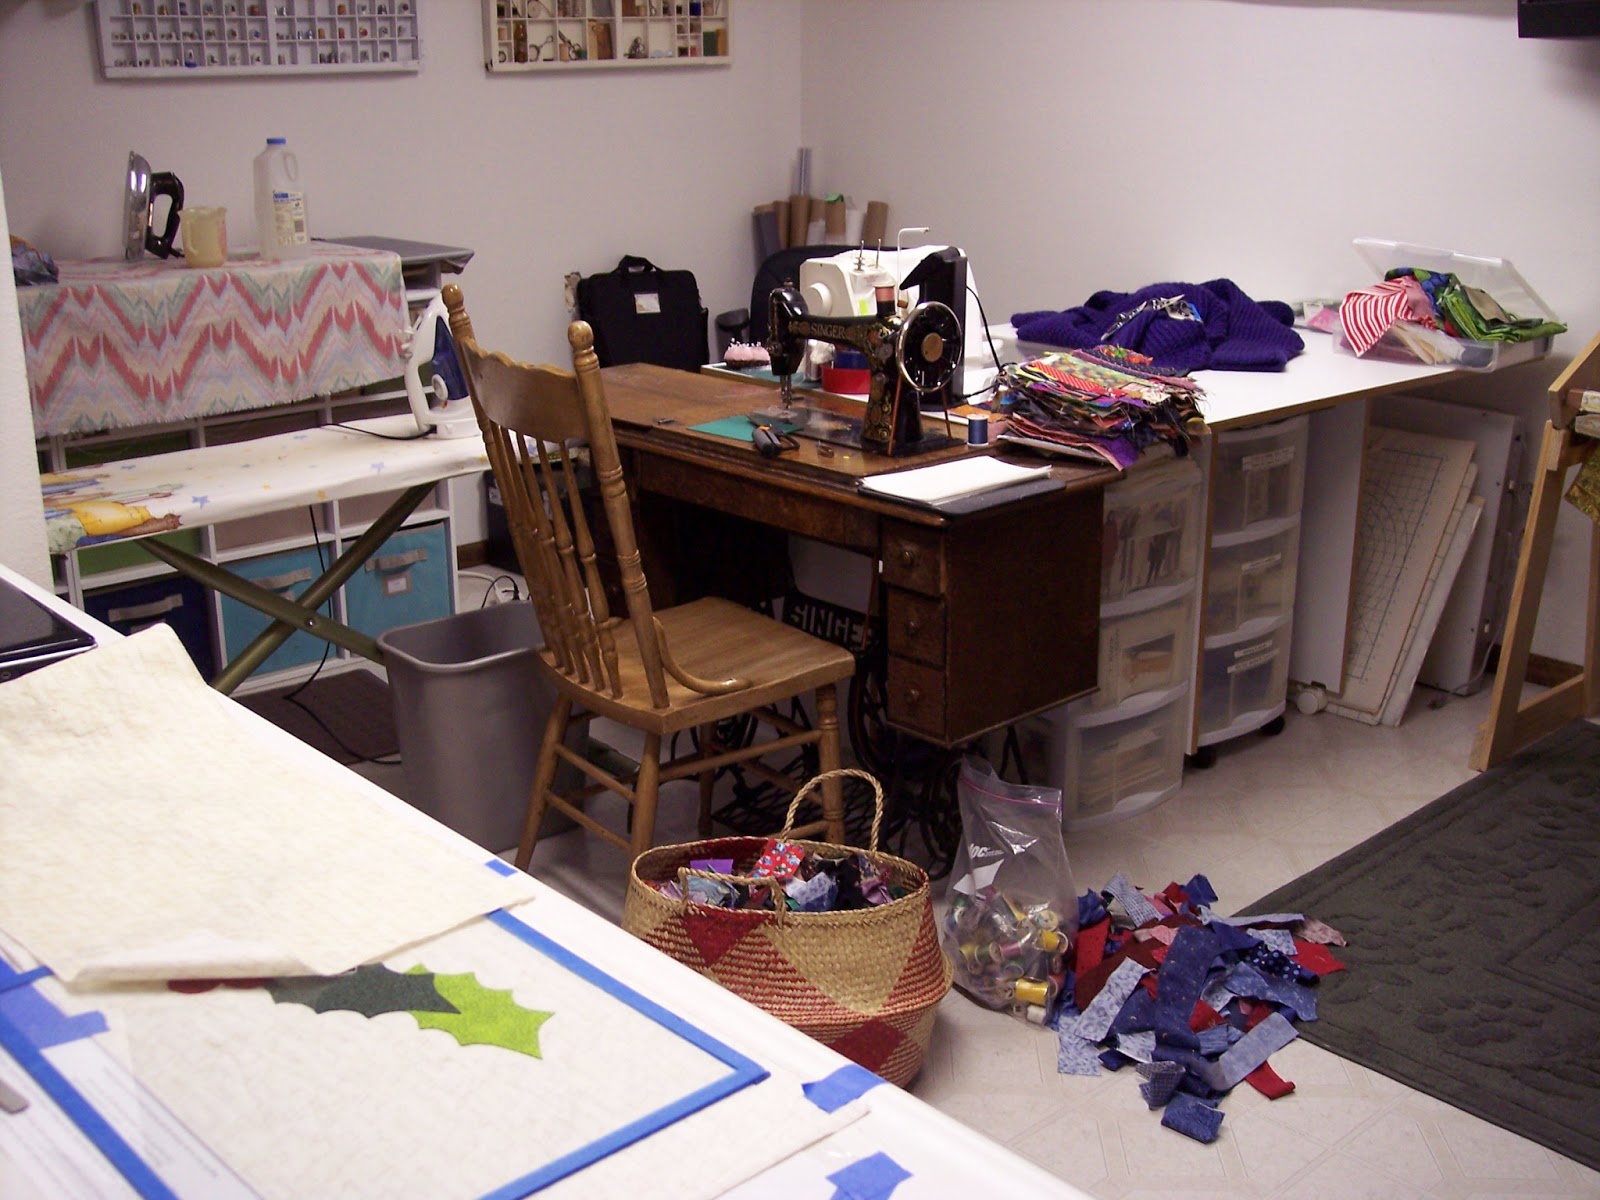
When I first started this project, I cut the background fabric for the outer border first. That way the borders would be cut out of one piece of fabric with no seams. That makes sense, right? I pinned a note to the two different sizes and hung them in the closet.

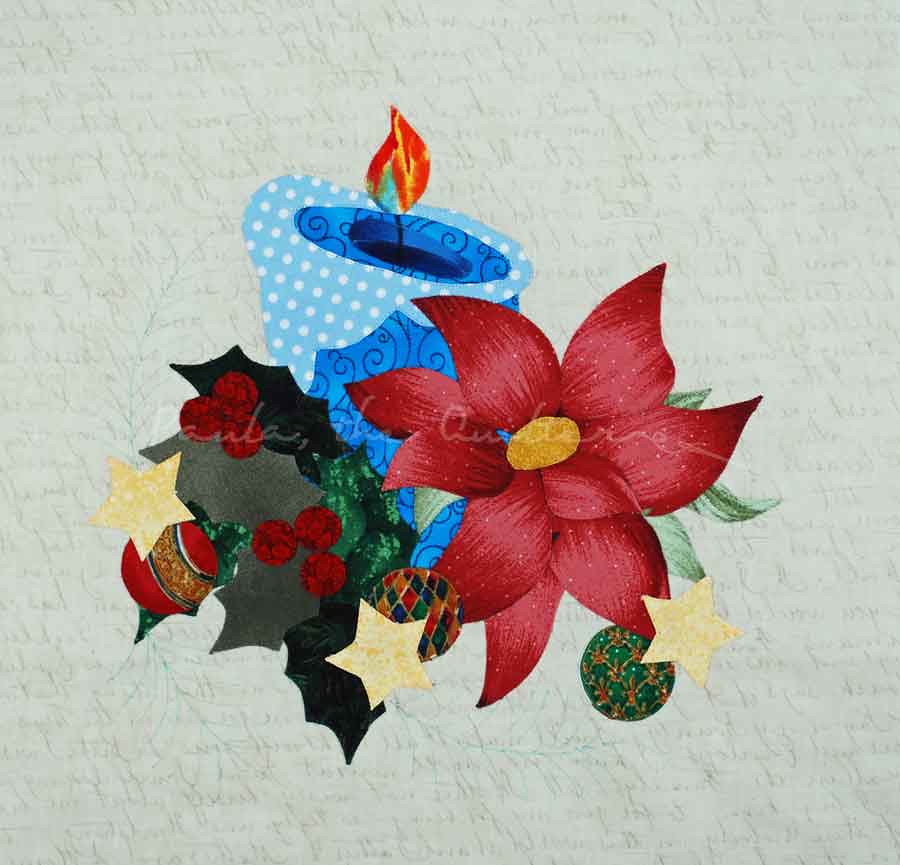
Okay, fast forward to making the inner border, the green one you see in the photo. I referenced the notes on the borders hanging in the closet and cut the green fabric accordingly, assuming that I cut the outer borders for miters.

You can see where this is going, right?

The green borders were stitched onto the outer ones so both borders could be mitered at the same time. Once the borders were hung in place around the applique center,  I realized that the outer borders were not cut long enough for a miter and, therefore, the inner borders weren't either. Oh dear.

Out came Jack the Ripper and I spent Saturday, carefully removing those seams and then pressing both borders flat. On Sunday, I was able to get the inner green border stitched onto the center. Yay me!

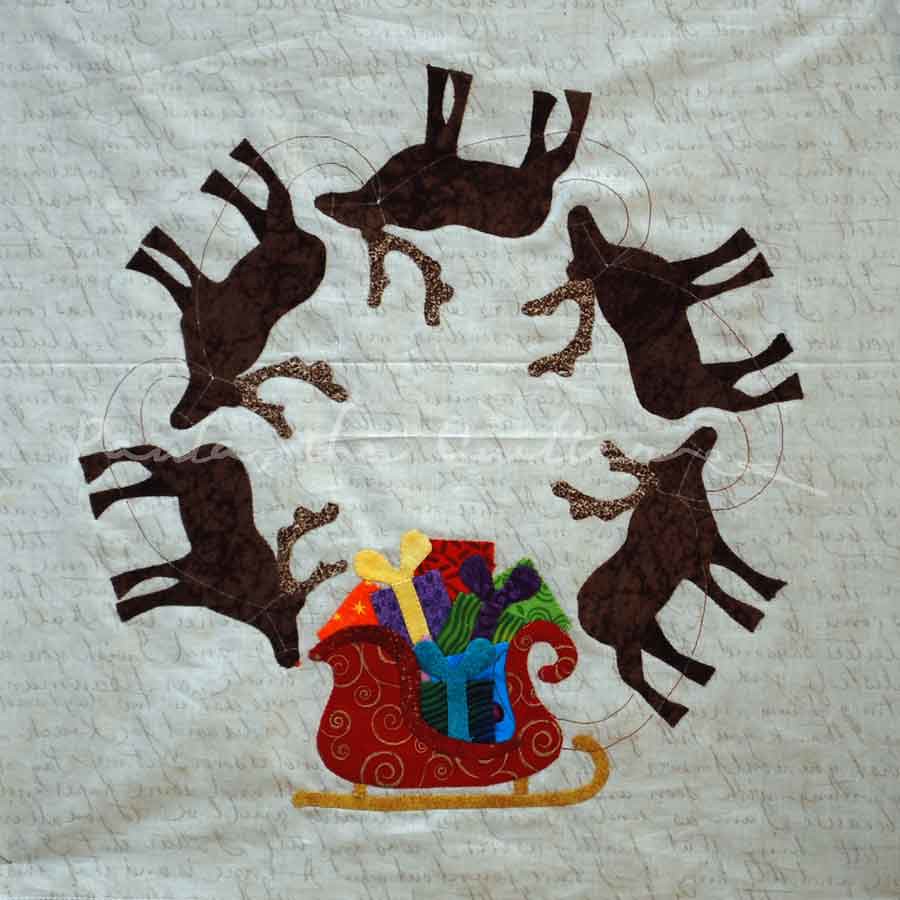
If I had only paused to remeasure both the pre-cut borders and the center. If I had only written down my intent on the borders. If only, if only. But all is well now. I was bemoaning that the quilt would not have  lovely mitered corners when inspiration struck. I pulled out a recently quilted, but not bound, applique quilt and checked the borders. Yes, I had done a straight border where the top and bottom were applied first and then the sides. With an applique border, you don't really see the seam at the corner because the applique disguises the seams. Boy, did I luck out.

And another plus: I can do the majority of the applique on the border before I stitch it onto the quilt. It's a win-win.

I'm linking up to JudyL.

15 April 2013

Design Wall Monday - April 15, 2013

There is a bit of progress to show on the Baltimore Christmas applique quilt. The blocks are done and sewn together. The two fabric pinned to the wall above the blocks were the choices for the inner border. When I stuck that green stripe up (see it there to the right?) the mottled green said to chose it. The red is going for another project, whatever that may be. I love that green stripe for the binding, don't you?

I apologize for the crappy photo, but I was in a hurry this morning. 10 inches of snow meant I needed to leave the house earlier to get to work. My little Kodak Easy Share camera doesn't have the stabilization that my big Nikon has. But you get the general idea.


The next step is borders. There is a 2" inner border, hence the green, and a wider appliqued border. All embellishments including buttons, beads, embroidery and whatever will happen after the quilting. I am really looking forward to both the quilting and the embellishment. I'll be doing the quilting on my DSM.

Do you want to see more design walls? Then visit Judy at Patchwork Times.

14 February 2013

24 Hearts

YouveStolenMyHeart

This is a quilt I made several years ago to test out different ways to 'applique'. One of the hearts is painted on using a stencil and Shiva Paintsticks. This includes both hand applique and machined applique. A bit of reverse applique and redwork is there too. The bows in the sashing are machined on. Happy Valentine's Day everyone!

03 December 2012

Design Wall Monday: December 3, 2012

Santa Claus applique partially completed

Here it is, the first Monday in December and I actually have a holiday themed design table. I pulled back the overlay with the cartoon drawing on it, so I could take this photo. It doesn't look like I've accomplished much but the hobby horse and the house (with the wild striped paint job) are the latest editions along with the bottom of Santa's suit. I still have to stitch down the horse's mane and the bridle. I used a polyester 'velvet' ribbon for the bridle. Want to see the wee bit of progress from the last time? Click here.

For other design walls, or tables like mine, go to Judy L's Patchwork Times blog.

26 November 2012

Design Wall - Cyber Monday - November 26, 2012

It's bad enough that I am working on the Baltimore Christmas quilt that isn't even finished, but I caved and bought the entire pattern of Audobon's Christmas Quilt. It was the free shipping from AQS today (Cyber Monday) only. I am indeed certifiable.

When I got the latest issue of American Quilter in the mail with the latest catalog with this quilt on it's front, I've been thinking about this quilt. Nope, wasn't gonna do it. For four days I thought and ruminated. Today when I opened my email and AQS was just pushing free shipping at me, well, I just did it. It will definitely be a wall quilt because when it is done, nobody will be using it on the bed. No sir-ee.

Speaking of the Baltimore Christmas Quilt, no progress has been made since the last report. Holidays and life got in the way, doncha know.

It turned cold and there was a spit of snow today. Wished I was at home quilting rather than at work.

Want to see more (and actual) design walls? Visit JudyL's Patchwork Times.

19 November 2012

Design Wall - November 19, 2012


As you can see, some progress has been made. Santa has his face, beard and mustache. And his belt and belt buckle. I think I might have put the 'fur' of his hat on incorrectly, but since it is a solid white, I'm not going to worry about it. It is stitched down so it is not going to be redone. Can you see those three red berries between the fur trim and the holly leaves on his hat? I am going to make some yo-yos in that size and stitch them on top of the existing berries just to give a bit of depth.

Next up: the hobby horse that Santa is holding. Working in groups of ten makes appliqueing a large piece much more manageable.

For more design walls, please visit Judy's post.

12 November 2012

Design Wall Monday - November 12, 2012


Work is continuing on the Baltimore Christmas quilt. These pieces belong to the center medallion. Can you see that tiny little C-shaped  piece? Wowza. There are so many pieces to this block, I separated them out into envelopes. Recycling the return envelopes from the snail mail for the small applique pieces works well. Only ten pieces per envelope, makes the work seem to go faster. And, yes, I do use two different Clover mini irons: one for the glued portions and one for the liquid thread portions. When the liquid thread gets heated up, it just makes a mess of the iron bottom. The one Clover iron is so bad, that I will probably throw it away when this is all over.

I just noticed that there were three pair of scissors in that photo. *LOL*


And the progress is shown drying on the light table. The pattern is taped to the table and then covered with some of that clear vinyl furniture cover. I dot the glue onto the back of the applique piece (dot dot not a lot), position the applique, weight it down with a piece of glass and walk away until the glue dries. The clear vinyl keeps the pattern in good shape. Do you see that stack of coffee filters in the upper right corner? I use those to hold things. Or to wipe down mirrors and glass since it is a perfect source for lint free wipes.

So, what's on your design wall? Go to Patchwork Times to see other walls.

29 October 2012

Design Wall - October 29, 2012

I must confess. I did not like the angel block in the Baltimore Christmas quilt pattern. Not that there was anything wrong with it, I just did not feel that it went with the rest of the quilt. Can you remember all the blocks I have posted up to this point? If not go here to my flickr account: they are all there.

Good, you are back. Now go here to P3 Designs and look at the angel block. Not only are we talking itty bitty pieces here but it is the one of two times that pink shows up. The dolly's dress is pink and I always wondered if the angels were dolls or was the dolly an angel? It is also the only religious seeming block while all the other are very secular.

I studied the blocks that I had finished and realized two items that are commonly associated with Christmas were missing. There were no candles or poinsettias.So I fixed my dilemma by designing my own block to replace the angel one. Not only did I include a poinsettia and candle, I pulled from the other blocks and used ornaments, stars and holly. The pine boughs are once again drawn onto the background.


DSC_1701-th

I have already started on the 24"x24" square medallion center but it will take a bit longer than the 12" blocks.

Oh, and I finally figured out how I am going to shade the applique. I have  problems with a heavy hand when I try to use paint, so all along I've been thinking of pencils or ink. After hours of online research, I found this tutorial: Colored Pencil w/ Applique. The colorless extender is in the mail. Problem solved.

For more design walls visit JudyL at PatchworkTimes.com

15 October 2012

Design Wall - October 15, 2012

DSC_1688-th

Oooffda! Here's another finished block.

You can barely see the reins and harness on the reindeer but, once again, those will be embellished after quilting. Are you working on this quilt? I will warn you about the packages in the sleigh. Since I am machine appliqueing this, I found it fiddly, fiddly, fiddly. Put a little piece of fabric down and then take it to the machine and stitch. Go to the light box and put another little piece of fabric down and then take it to the machine to stitch. My little assembly line went right out the window when it came to those packages. But it is done now so all is well.

One more block in the 12" size and then I can start on the center medallion.

Want to see more quilters' design walls? You'll need to go to PatchworkTimes.

24 September 2012

Design Wall Monday - September 24, 2012

11-StockingBouquet

The 'fur' at the top of the stocking is too light but I am not going to take it out. I'm thinking a bit of paint might darken it. Must use a very light hand. I'm closing in on the end of the smaller blocks. Keep in mind there is the center medallion and borders too.

For more design walls please visit Patchwork Times.

17 September 2012

Design Wall Monday - September 17, 2012

The Baltimore Christmas is being whittled down to size. Here's another block. If you click on it, hopefully you can see the faint lines where the embroidery and buttons will be stitched.

DSC_1648-th

I got started on the next block, the Partridge, but I made a major mistake on the tree and had to throw half of it away. Oh, well. It's not like I don't have any more brown fabric. LOL!

For more Design Walls, please visit Patchwork Times.
And you can go here for BOMs away Monday.


10 September 2012

Design Wall Monday - Sep 10, 2012

Here's another block in the Baltimore Christmas quilt. I am on a roll. Next block up is the snowman block. After that, I have 3 more plus the center and then the borders. I really am making some headway. I decided that if I ever want to get this quilt done, then I needed to work on this and this alone. Once all the applique is finished then I'll be able to move on to something else. Stay with me until then, please.

DSC_1639-th

Sorry for the blurry photo. Don't know what happened here. I'll be adding the embellishments and embroidery after the quilting so right now it looks a bit strange with the gingerbread man's eyes and the shading on the mistletoe berries or even the pine boughs.


For more Design Walls please visit JudyL at Patchwork Times.

27 August 2012

Design Wall Monday - August 27, 2012


100_4097-th

I've been busy on this BOM. The little quilting group I belong to is making this BOM. There are 14 of us doing this quilt. I am the only one doing machine applique, but that's all right. I was so far behind that I made it a goal to just work on this quilt alone. No dividing my time between projects. This way I can keep my machine set up with the proper thread, tension and needle. Once the prep work is done, and there is a lot of prep work, the stitching is speedy. If you are keeping count, this make block #7.

You can see the faint lines I've drawn for the embroidery. I won't be doing any of the embroidery or embellishment until after it is quilted. All the gingerbread men will need eyes and buttons and the pine boughs for most of the blocks will need to be stitched. There are other places here and there that I will be stitching too.


17 August 2012

Dance!

Dance-th

I entered a quilt show. The Rocky Mountain Quilt Festival to be exact. I entered as an individual with no guild ties because I wanted to be judged and I'll get the judges comments back when I pick up my quilt. But LOOK! Do you see the ribbon? How could you miss it, right? 2nd place in applique. I never expected that!

Here's the back story on the quilt. It started as a challenge between two friends and there were quite a few guidelines.
  • it needs to be based on a poem or song
  • outside perimeter dimensions were not to exceed 160" (this one is 120")
  • both piecing and applique need to be used ( the back is comprised of lots of pieced pinwheels in purple and the polka dot fabric)
  • and like the Hoffman Challenge, a certain fabric (in this case the polka dots) needed to be used.
I think I met, and in the case of the polka dots exceeded, the guidelines. What do you think, MagicLady?

I hand painted the background for this original design and am extremely pleased with the way it turned out. All the applique is satin stitched including the lamé on the dragonfly wings. My drawing style is pretty obviously cartoons. Try as I might to do realistic, it just doesn't happen.

Deb Geyer, in Anderson, Indiana did the quilting.