
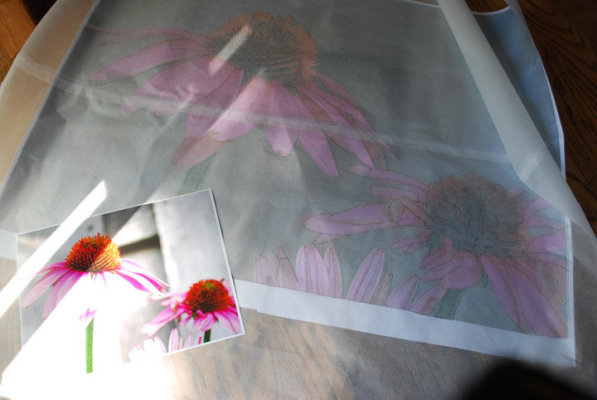
Before attending class, the first step is to enlarge the selected photograph. It should really be your own photo if the quilt is to be shown or sold. Enlarge the photo by printing out sections onto sheets of paper and then taping together. My quilt started out to be roughly 32x44" but will be more like 32x32" square.
Day 1
Tracing paper is taped together to cover the enlargement and then a tracing of the photo is made with pencil. As you can see, I started to trace the whole thing. In class, David Taylor said to ditch the two flowers on the right and concentrate on the big one. I also asked how to handle the seed head of the flower as my first inclination was to make big curvy sections. He started to draw ovoid shapes into the area.
"Seriously?" I asked. "Seriously." he said. "Do it like I did the pine needles in the Chickadee." And so, the seed head will have 107 pieces to applique. I think I can handle that, since he did 403 pine needles. Serious hand applique, folks, but worth it.
The tracing is then transferred to freezer paper and the applique templates are made. I have already given an inkling of how many pieces my flower has, but the total was 157 applique pieces, not including the background.
Day 2
The next day was spent fondling fabric. I am not at all exaggerating. I had a pile of pink fabric in front of me on the table and another pile on the floor at my feet -- messy piles, not neatly folded piles. I was looking for the best spot in the fabric for fussy cutting flower petals. By the end of the second day, I had about 10 petals halfway prepped. This is the freezer paper on the bottom, turn over the edge of the fabric and starch method of applique. Pretty standard stuff.
Once I get all my pieces prepped it is on to the actual applique. The prepping is a good in front of the teevee job and will take quite a while. Stay tuned, I'll show some tidbits along the way.
Hats off to all your pros! You make it look easy and beautiful. Sooooo much work and the fingers get soooooo sore.
ReplyDeleteIt's going to be gorgeous!
ReplyDeleteOh, my! Seriously? It will be stupendous!!
ReplyDeleteFabulous fun! I can 'see' his comments...after of course, he said them! I absolutely cannot wait to see your progress!!!
ReplyDeleteOooh! I cannot wait to see and hear more about your workshop!!!
ReplyDeleteNow that sounds like great fun.
ReplyDeleteGlad you are enjoying yourself.
wow! Love the enlarged photograph, so pretty... And all those pieces to keep track of! I think you are brave, and I think this will be stunning!
ReplyDeleteI think that is the difference between the great masters and little people like me. They aren't lazy and are willing to take the time to do it right. So what if you have to applique a million pieces. And to fussy cut all of them will make it even more masterful. I'm sure it will be evident in the end result as you make your masterpiece.
ReplyDeleteI am so anxious to see what you have created - just the design process sounds wonderful.
ReplyDeleteThis is really cool!
ReplyDeleteIt all sounds fabulous - just don't keep a tally of the numbers!
ReplyDeleteSounds like a great class - can't wait to see how you progress.
ReplyDelete