
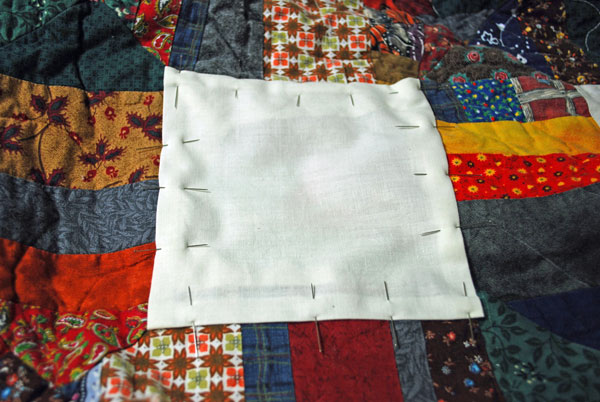
After stitching down the patch, I trimmed the old chewed up edges off so there wouldn't be as much show through. A piece of batting was cut to fill the void and the whole area was then pin basted.

The first thing I did was straight line stitch from corner to corner in the new block to make it look like the rest -- a fool the eye thing. The old meandered quilting stitches that were removed left needle holes that I was able to follow for the rest of the quilting.
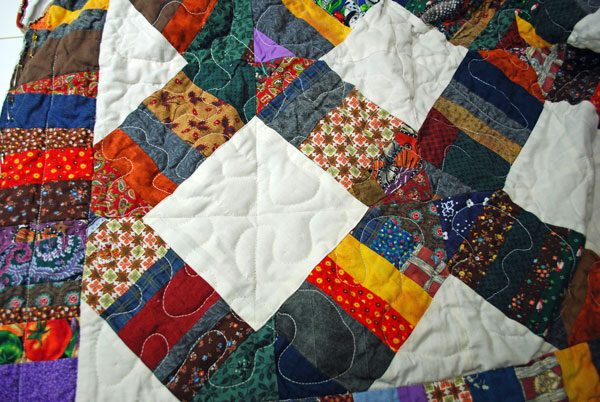
Here is the patch on the front after quilting. I am not going to show the back because the fabric is so busy you would not be able to see much. I then turned my attention to the other nibbled corner. The dog only took out about a section that was 6 inches wide by 1/2 inch deep, but that included the binding. I am so glad I used the same fabric for the binding that I used for the backing because I have a bolt of that stuff. Yes, I do and it makes wonderful busy backings.
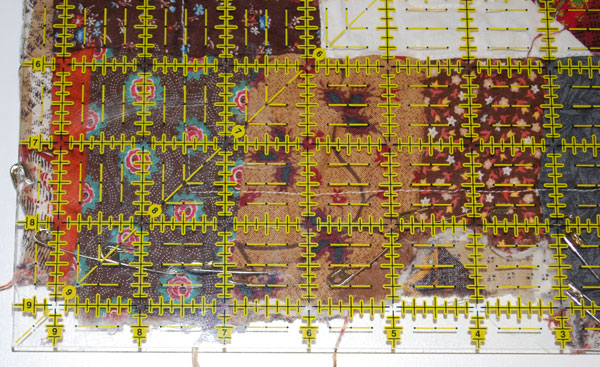
Once again the binding was removed so that I could work in the area. Then I straightened up the edge a bit.
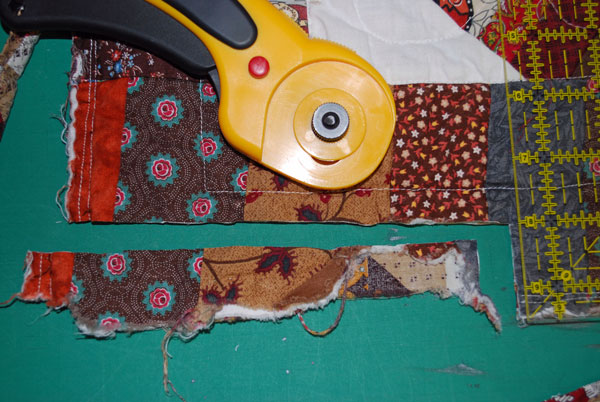
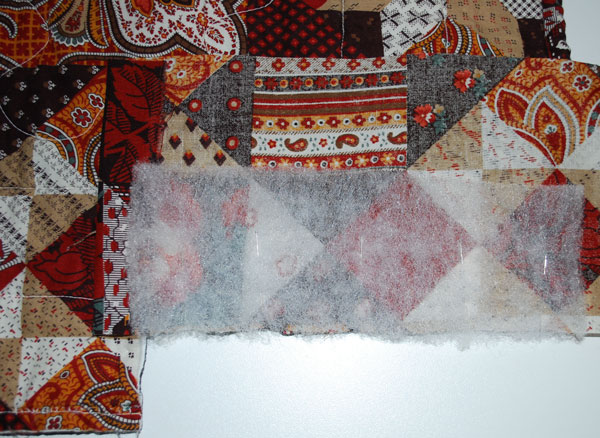
I cut a large piece of the backing fabric, turned under one short end and pressed. The fabric patch was placed face down on the straight edge (cut in the previous photo) on the backing side of the quilt. Batting was added on top and then machine stitched through all layers; the batting was trimmed out from the seam allowance and the patch and batting were pressed down in a sew and flip technique. Once the patch was flipped, the batting butted up against the older section of the quilt but the fabric patch overlapped it. (See what I mean about the busyness of this backing!)
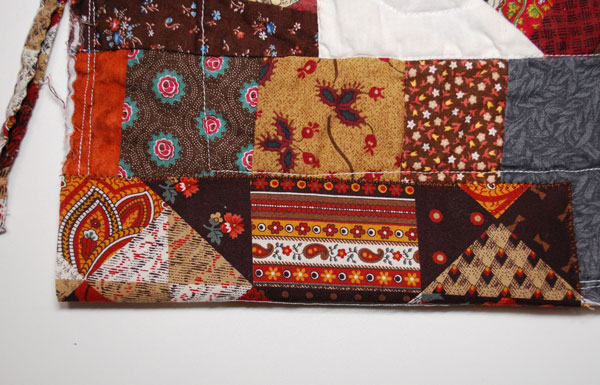
On the front side of the quilt, the patch was brought over the batting and the raw edge on the long side was turned under. I used a zig-zag stitch around the two sides of the patch, making sure to catch the unstitched patch on the backside of the quilt. The patch was then cut even with the edge of the quilt. O and the fun part? Making a new section of binding to fill in what the dog nibbled off.
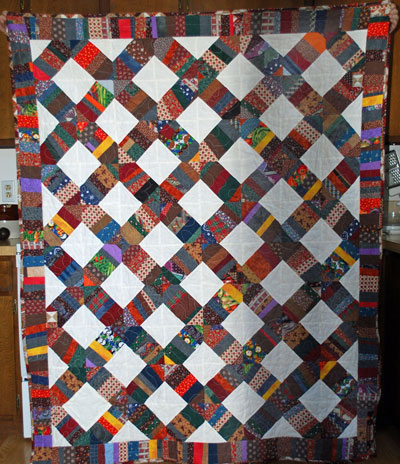
Here's a shot of the whole quilt after the repair. The hole that was filled is in the lower left corner and the corner and binding that was fixed is not very see-able in the the shadowed lower right corner. Sorry.
And a close up that shows both repaired sections.

And there you have it: how I repaired my sister's quilt.
You did an excellent job. Am glad you are done, as I know this was a dreaded project. It really looks good and I think you should give yourself a couple of pats on the back.
ReplyDeleteGreat job! I wouldn't have the patience to repair anything let alone a quilt. you did a great repair job and your sister should be extra careful with that quilt.
ReplyDeleteI think your patch job is great. Any idea why the dog chewed it and how to keep him from doing it again The quilt is obviously a hit with your sister, hopefully the dog has tired of it
ReplyDeleteGreat job! Your sister will be thrilled!
ReplyDeleteThat is a great scrap quilt you made!
ReplyDeleteThanks for detailing the repair. I never would have thought of those ideas.
One of the best things about a scrap quilt is that you could have added in any fabric and it wouldn't be noticeable.
Now...how is that sister of yours going to keep her crazy dog away from the quilt?!?!
You did a terrific job on the repair! It looks fantastic.
ReplyDeleteWow ... you came to the rescue .... great job on fixing the holes!
ReplyDeleteWow....great job on the repair.
ReplyDeleteYou did a wonderful job. You really can't see the repair in the photos.
ReplyDeleteThanks for sharing the process!
ReplyDeleteWow Paula.......thanks for the tutorial...you are really good with repairing.....I say again...WOW!
ReplyDeleteWow that is impressive...you did a great job!
ReplyDeleteYou did a great job on your repair, Paula- only you and your sister will know that you repaired it. It was nice that you still had some of the same fabrics to blend old with new.
ReplyDeleteThanks for sharing your process too.
Happy weekend.
Regards,
Anna
if I was your sister, I would be making dinner for you or doing something great in return -- as a surprise would be good! Excellent work!
ReplyDeleteThanks for letting us see the magic you worked. Good job.
ReplyDeleteI hope the quilt will be kept away from the bad dog.
That is impressive. Congratulations on being patient and enterprising. I ONLY HOPE your sister doesn't think repairing a quilt is easy or it could happen again.
ReplyDeleteCertainly keeping fabric and scraps is useful for this sort of repair.
Paula, You can be PROUD of your work!!!
ReplyDeleteWow that is amazing! You can't even tell that it was patched up. The quilt definitely has a story now.
ReplyDeleteThank you, Paula - maybe I can take YOUR experience to fix my damaged GFG! You did a great job!
ReplyDeleteFunny, it looked so 'hopeless' and tattered in the BEFORE, but after repairs are done, it's just perfect!
Wow. That's it.
ReplyDeleteI'm Bev, Paula's Little Sister, the one with the "bad" SuperPuppy named Bingo. Bingo is a 9 month old Australian shepherd. He had never done anything like this before, so I had taken no special precaution with the quilt. Paula gave it to me in 2002 and at that time, I was a smoker. I kept the quilt boxed up except for special occasions for several years. I was afraid something would happen to it. When I quit smoking a couple of years ago, I happily pulled out the quilt and began using it as a sofa throw. My dh freezes me out so I cuddle in the quilt. It never even touches the floor. When we got up that morning a few weeks ago and found that Bingo has drug the quilt through the house and chewed that massive hole...I almost cried. I know how much work quilting is. Paula says this is not an heirloom, but she made it expressly for me, and to me it is priceless.
ReplyDeleteI, like most of you, am utterly amazed by the repair. I knew Paula could do it. I just had no idea that she would(I was worried she would be mad at me), and I had no idea that she could it so quickly. She's awesome, and while I always miss seeing her, it is times like these when I REALLY miss being there. I live in Northwest Georgia, so I can't fix her dinner or anything. The material I sent was a small downpayment on what I owe her. As to my Wild boy Superspuppy Bingo, well, he is now sleeping in a crate again. I think he actually prefers that anyway. Aussies play hard, but they sleep hard, too.
I'm glad so many of you liked my quilt, and I'm even more glad that Paula shared it with y'all. I sent her some pics of Bingo separately. Maybe she will share that, too! Bev in NWGeorgia
What a fantastic tutorial! I would have had NO idea how or where to begin. Thank you for sharing the process. I think I should bookmark this post for future reference *s*
ReplyDeleteThat was awesome....I wouldn't have known where to begin. You are just an amazing quilting woman. :)
ReplyDeleteWow, nice repair Paula! It's very satisfying to take something likethat & make t look right.
ReplyDeleteThanks for stopping by & dropping a line. Must be the season for repair jobs! You're right, "great minds". Funny!
Great job--that quilt will last for years more
ReplyDeleteWow, great job! it looks so good. Hope your sister is keeping the quilt out of dog reach in the future!
ReplyDeleteI am in awe. Awe. blessings, marlene
ReplyDeleteWOW...you did a great job!
ReplyDeleteThat is a wonderful quilt and your repair job is excellent! Lucky it is so scrappy, and obviously it is loved! Great job!
ReplyDeleteSorry about the late comment, but I got being in blogging. What a great repair job! I hope I *never* have to use this information, but it's good to know just in case. (Or "just in cases" if you like the movie Love Actually!)
ReplyDelete