
I think it is time for a tutorial, don't you? How about one on putting quilted sections together and hiding the seams?
As you know, The Firewood Quilt (yes, again, I mention this thing) was quilted in this manner. There was one major decision to make before quilting began: what batting is going to be used? I recommend a lighter weight batting because it will lessen the bulk of the quilt that will need to go through the harp of your domestic sewing machine. I chose a Warm and White batting by the Warm Co and that is what you will see in the following photos.
Let's begin.
Once you have the center of your quilt divided into sections you need to baste and quilt them. I did a moderate sized meander on the 4 sections of this quilt making sure to stay away from the edge about 1" or better. This will not only give a bit of room when stitching all the layers together, but when you go back and fill in this blank area with more meanders it won't stand out.
▼ ▼ ▼ ▼ ▼ ▼ ▼
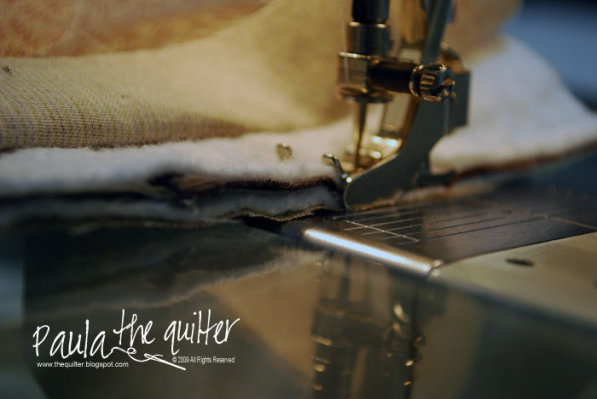
Photo 1
Each section consists of three layers: top, batting and backing; just consider each section as a small quilt all by itself. Make sure to trim accurately -- all layers within each quilt are even. Now, place two quilts together front-to-front and make sure all your edges are even. Fold the top layer back and pin it out of the way, you can see this in Photo #1. You will now carefully stitch 5 layers together: batting, top, top, batting, backing.
▼ ▼ ▼ ▼ ▼ ▼ ▼
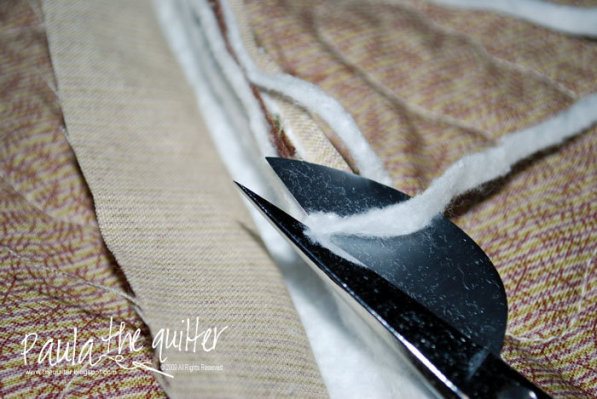
Photo 2
This next step is a bit fiddly but don't skimp doing this because the seam will be way too bulky. You need to trim the both batting pieces from the seam as in Photo 2. I found that spreading the joined quilts out on a table helped a lot. If you are unsure of your skills, use some child's blunt nosed scissors instead of your regular ones. In fact, I use a pair of these when I do trapunto. Be patient and take your time, you don't want to let your scissors slip on this one.▼ ▼ ▼ ▼ ▼ ▼ ▼
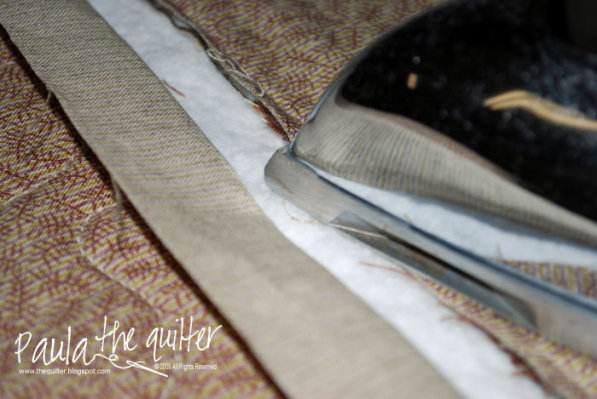
Photo 3
Now you need to press this seam as flat as you can get it as in Photo 3. Remember to not press a tuck in on the other side. This is just like pressing a block, only bigger. Are you with me so far?
▼ ▼ ▼ ▼ ▼ ▼ ▼
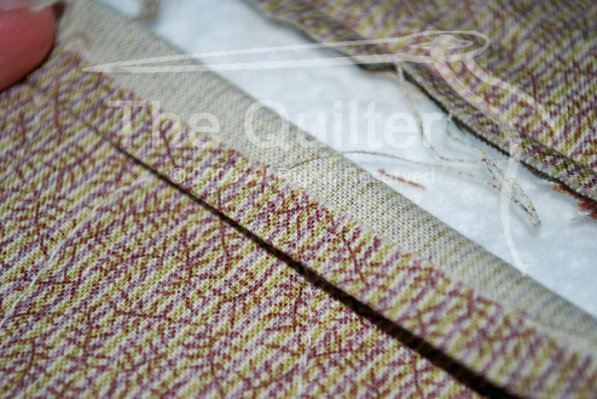
Photo 4
Once all the batting has been removed from the seam, we need to address the backing that was not included in the seam. Press under a quarter inch of this backing like in Photo 4.
▼ ▼ ▼ ▼ ▼ ▼ ▼
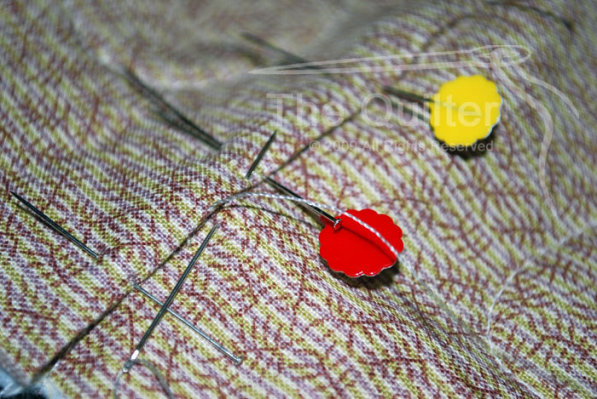
Photo 5
Now you get to settle in for a bit of hand stitching. I like to use as small a stitch as possible so that my stitches are hidden. I just parked my needle for the photo so this next stitch looks like it is going to be gigantic. And the doubling up of pins (you can see one silk pin on top of the red flower head pin) is just for the camera. I realized that the pins were almost invisible in the camera's eye.
Once you have these steps done, put this section under the machine needle and free motion a meander down that blank area. Pull it out from under the machine needle, admire your work and go on to the next one.
Hope this tute was helpful.
Thank you so much for the tute. I have been thinking about trying this with a crumb top I'm just starting to put together. The bulk of a full top is just so hard to cram into the space on my old machine to quilt. Now that you have shown how to do it in sections, I'm going to try it.
ReplyDeletethat's a lot of hand-stitching, but I need to try this method sometime!
ReplyDeleteYou are so clever. As hand stitching binding is my favorite step, I think I could come to enjoy this method very much *S* Thank you for sharing.
ReplyDeleteThank you for this...I will try it! I have a devil of a time quilting a big quilt, meandering...this may work for me!
ReplyDeleteI use a similar method, except that I hand sew the seams of the front sections together. I enjoy making big quilts this way, because then it's easier to machine quilt. Be careful not to lose any pins in the batt! I once found a pin the hard way.
ReplyDeleteThanks for this! A very useful post. Especially for us secondary sewing/quilter people.
ReplyDeleteVicki
I saw this tutorial referenced on Myra's PhD Challenge site. Thank you, I have always wondered how the quilted blocks would get put together. Now it all makes sense!
ReplyDelete