
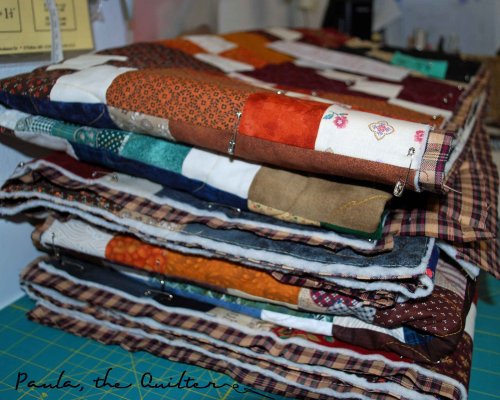
Can you believe it? The Double 4-Patch (need to come up with a better name) is 75% quilted. It is a LARGE quilt: 96" x 108" but that is not stopping me from quilting it myself on my domestic sewing machine. I can hear the groans from all of you! Really it is easy. Just quilt four smaller quilts.
I divided this into four 48x54" quilts. After the pin basting in the last post, I marked off the sections that I DID NOT want to quilt in chalk and then proceeded to quilt my four smaller quilts.
Here is how I am putting my four small quilts together to form the large quilt. Be forewarned that this is a long slow process.
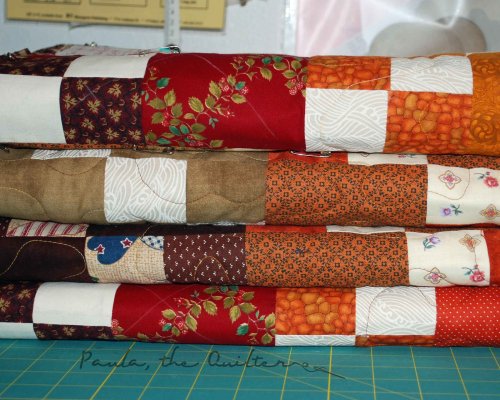
The following picture shows the lower right and lower left sections of the quilt. You can see the quilting depicted by the black meandering line. The outside edges of the quilt were trimmed so the binding can be applied with a minimum of fuss. The top and batting of the inner edges are squared up and the backing of the inner edges is trimmed 1/4"larger than the top and batting. Got that? This is really important.
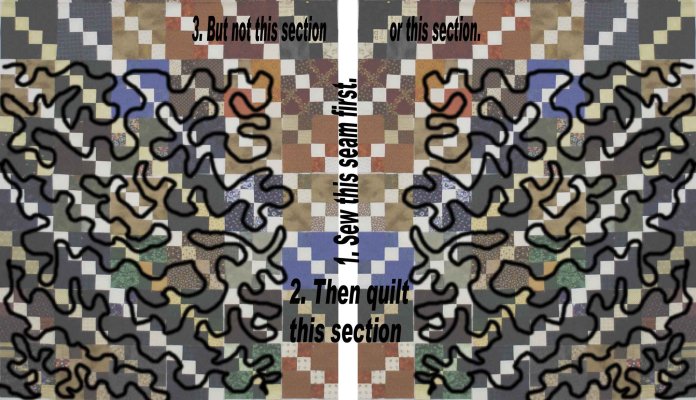
1. The first step in the picture, is to sew these two sections together. Start by turning each section over and pulling the backing only out of the way and pinning it. Then layer these two sections quilt top to quilt top, matching the block seams and sew together with a 1/4" seam through the tops and both layers of batting all the way from the top to the bottom.
Flipping the quilt over so the seam is exposed, remove a bit of bulk from the seam. This is a fiddly job be CAREFUL to cut the batting out of the seam. I usually use the blunt nosed children's scissors from the school supply aisle in the office supply store because the blades are short, which forces me to go slow and there are no sharp points to accidentally go through the fabric.
This seam needs to be pressed flat, flat, flat. To get a nice flat seam I use my version of a dressmaker's clapper which is just a nine inch length of 2x4 lumber. Open up the seam, press and when the iron is removed immediately clap the board on the area until it is cool. Move along the seam doing this. Remember, this is not a race.
You realize that we are still on step #1, don't you
Now you need to turn the quilt over so the backing is face up. Remove all the pins you used to keep the backing out of the way. Smooth one side flat over the seam. Smooth the other side over the first. Now, turn under 1/4" and press and pin in place. Move along the seam doing this.
Time to relax with a bit of hand sewing. Stitch the backing seam in place. Whew! Step #1 is completed.
2. Now quilt over the seamed area going only as high as the previous quilting .Repeat this whole sequence for the upper right and upper left. Ready to put the whole thing together? Look at the next photo and you will see what was just completed and where we are headed.

Okey-dokey. Now combine the upper half to the lower half the same way as before. Once the quadrants are combined, quilt it. Ta-da! There it is, a large quilt that has been quilted on a domestic sewing machine. One caveat: choose the quilting pattern carefully. I used a large meandering pattern because it is easier to blend the additional quilting.
Update: for further reading here is another post on this subject: Tute, Tute-Tutsie
Wow... that is cool! What type sewing machine do you have?
ReplyDeleteMy 20 yr old Bernina only has a 7.5" arm and I still don't think I could get all that fabric in that opening.
Thanks for the great instructions. I may have to try that.
ReplyDeleteWOW, what an interesting and great technique Paula!! I definitely have to try it out!
ReplyDeleteThanks for sharing!
Wow, impressive! I don't think I'm up for the attempt myself, but who knows -- maybe one day.
ReplyDeleteMe too, I like to quilt big quilts in sections. Otherwise, I have to tie them
ReplyDeleteExcellent tutorial. I've used this method myself with great success.
ReplyDeleteI KNOW it can be done but just thinking about it makes my head hurt. If my sister ever takes away my longarm privileges, I will have to hurt her!
ReplyDeleteThanks for posting this tutorial. I hope to try it on my next big quilt top that I make.
ReplyDeletecindy
Hey I think I could do this, it makes it feel like a "manageable" project!
ReplyDeleteThanks
Vicki