Showing posts with label Double 4-patch. Show all posts

07 March 2011

First Finish of 2011

395547508

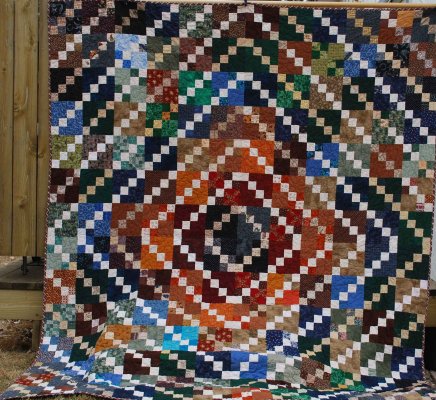
"I'm so pumped thank you thank you!!" "Its totally awesome!!!!!" These are the two text messages I received from the recipient of this quilt. Isn't it nice to have a quilt really appreciated?

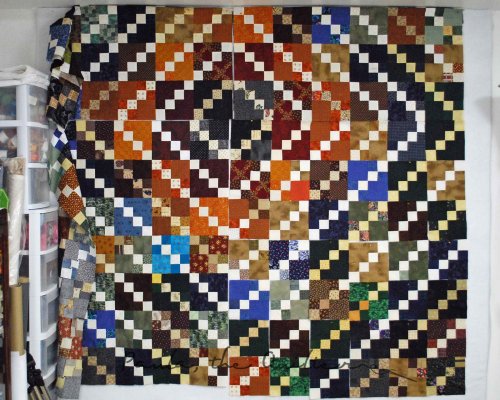
This is a double 4-patch and I have called the quilt "Emergence". Why Emergence? Because the secondary design created by the color emerges when you take a second look. The quilt measures 90x108" and made totally from scrap, including the batting. This was quilted on my domestic sewing machine in sections and then joined. The backing was the last of a bolt of fabric purchased at a church rummage sale.

25 February 2011

Ugly Duckling

100_3348

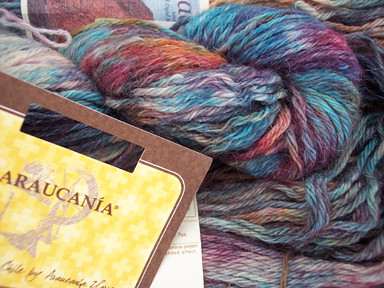
Just because it is hand painted yarn does not make it pretty. I tried a lot of different things to the swatches that I knitted trying to get something pleasing out of this yarn, but it was not going to happen. I did not want to discard this yarn because it is 100% alpaca and is just so, so soft. What to do?

DSC_0847-th

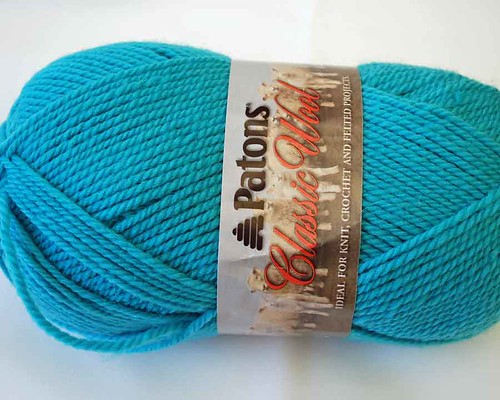
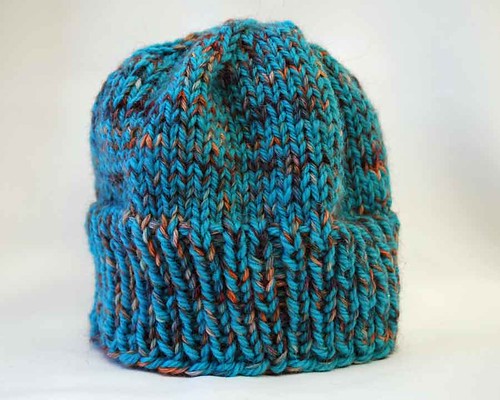
Enter a beautiful color. By adding a beautiful color to the ugly color it spread out the ugly which ended up in a pleasing blend.

DSC_0857-th

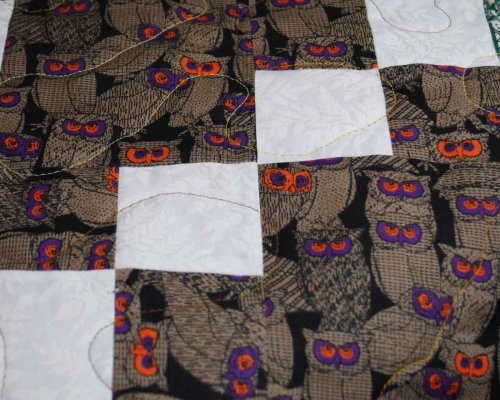
This happens in scrap quilts too. Use those "what was I thinking" and ugly fabrics in your quilt tops. This owl fabric is a good example. Taken individually, it stands up and shouts "look at me!".

395287936

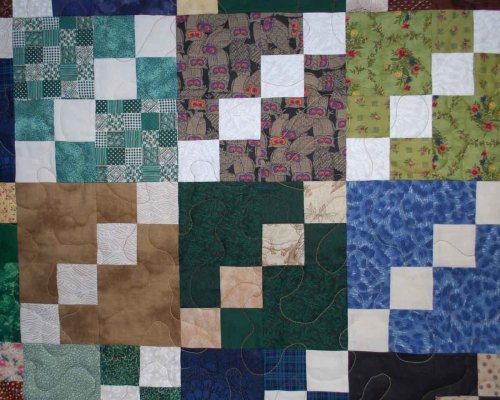
But look what happens when you add it to a lot of other fabrics.

395287933

 Those unfortunate fabrics will work, I promise.

08 February 2011

Quilting in Sections

395030217

Can you believe it? The Double 4-Patch (need to come up with a better name) is 75% quilted. It is a LARGE quilt: 96" x 108" but that is not stopping me from quilting it myself on my domestic sewing machine. I can hear the groans from all of you! Really it is easy. Just quilt four smaller quilts.

395030215

I divided this into four 48x54" quilts. After the pin basting in the last post, I marked off the sections that I DID NOT want to quilt in chalk and then proceeded to quilt my four smaller quilts.

Here is how I am putting my four small quilts together to form the large quilt. Be forewarned that this is a long slow process.

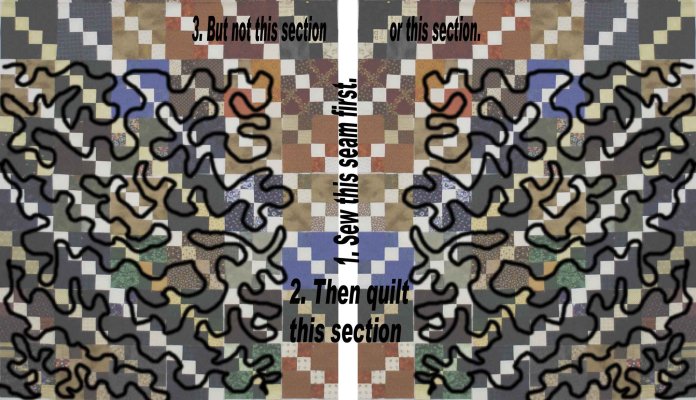
The following picture shows the lower right and lower left sections of the quilt. You can see the quilting depicted by the black meandering line. The outside edges of the quilt were trimmed so the binding can be applied with a minimum of fuss. The top and batting of the inner edges are squared up and the backing of the inner edges is trimmed 1/4"larger than the top and batting. Got that? This is really important.
1. The first step in the picture, is to sew these two sections together. Start by turning each section over and pulling the backing only out of the way and pinning it. Then layer these two sections quilt top to quilt top, matching the block seams and sew together with a 1/4" seam through the tops and both layers of batting all the way from the top to the bottom.
395039497

Flipping the quilt over so the seam is exposed,  remove a bit of bulk from the seam. This is a fiddly job be CAREFUL to cut the batting out of the seam. I usually use the blunt nosed children's scissors from the school supply aisle in the office supply store because the blades are short, which forces me to go slow and there are no sharp points to accidentally go through the fabric.

This seam needs to be pressed flat, flat, flat. To get a nice flat seam I use my version of a dressmaker's clapper which is just a nine inch length of 2x4 lumber. Open up the seam, press and when the iron is removed immediately clap the board on the area until it is cool. Move along the seam doing this. Remember, this is not a race.

You realize that we are still on step #1, don't you

Now you need to turn the quilt over so the backing is face up. Remove all the pins you used to keep the backing out of the way. Smooth one side flat over the seam. Smooth the other side over the first. Now, turn under 1/4" and press and pin in place. Move along the seam doing this. 

Time to relax with a bit of hand sewing. Stitch the backing seam in place. Whew! Step #1 is completed.
2. Now quilt over the seamed area going only as high as the previous quilting .
Repeat this whole sequence for the upper right and upper left. Ready to put the whole thing together? Look at the next photo and you will see what was just completed and where we are headed.

395039490


 Okey-dokey. Now combine the upper half to the lower half the same way as before. Once the quadrants are combined, quilt it. Ta-da! There it is, a large quilt that has been quilted on a domestic sewing machine. One caveat: choose the quilting pattern carefully. I used a large meandering pattern because it is easier to blend the additional quilting.

Update: for further reading here is another post on this subject: Tute, Tute-Tutsie

05 February 2011

Quilting Away!

DSC_0823-th
The Double 4-Patch is progressing at a rapid pace. Still on a mission to use what I have, I pieced the batting together for the quadrants. I am doing the machine quilting on my Bernina using my favorite technique from Marti Michell’s book, Machine Quilting in Sections. Here is a link to a video on YouTube about this book.
Like I said, I use my 1080 Bernina to do the quilting and the piecing on the batting. When I do the batting, I use my #10 Edge Foot. Can you see the flange there between the two pieces of batting? I smooch (technical term) the two pieces together in front of the foot and the flange keeps them just the right amount apart to stitch. The stitch I use is one that is designed for butting two items together; I lengthen the stitch so it doesn’t pucker.
DSC_0818-th
Then it was on to basting. I keep my basting table set up in my unfinished basement. One of these days, I really want to try the hand basting with the boards, but for now, I used my old stand-by method with the safety pins and my old banquet table. I got all four quadrants basted on Friday. Yipee!
DSC_0819-th
After using the table as-is the first time,I raised it with PVC pipe. If you do this you need to pop the caps off the legs. I can baste quite a bit using this method and my knees and back thank me for raising the table. Stay tuned.

29 January 2011

Moving Right Along

394886608

Do you remember the picture from this recent post? In that photo, only the upper left was sewn together and the upper right was waiting. I am proud to say that I've been moving right along on this top, because I now have three out of four sections pieced together. I am hoping that by EOD tomorrow the fourth will be done and then I can layer, baste and quilt.

I am lovin' how this is turning out.

08 January 2011

Forty

DSC_0804-th[2]

That’s how many seams I had to un-sew. I was blithely sewing along on the Double 4-Patch and stitched up a stack of 50 blocks. When I started to press them I realized that I had sewn ten correctly like in the first photo. But then I must have flipped the block when I put it under the needle because the other 40 were stitched like this one:

DSC_0805-th[2]

Not exactly the look I was going for *sigh*.
I am sewing up over 200 of these blocks, which is actually more than I need but I want enough blocks to be able to swap out if I want.