Showing posts with label fabric dyeing. Show all posts

10 January 2012

Old Textiles

The only quilt shown at the lecture was made from layers and layers
of old saris using reverse applique and a big stitch quilting.
The batting is assumed to be more saris.

I attended a wonderful lecture last evening. It was the January program of  The Rocky Mountain Creative Quilters. Linda Carlson, Curator of the Avenir Museum at CSU's University Center for the Arts discussed and showed special items from their collection that illustrated the rich history of textiles as it pertains to quilting and creating with fabric. There was yardage and garments and other special items that included laces and molas, ikat and mudcloth . I learned tidbits of information like the style of a Japanese kimono probably relates to traditional Mongol clothing. And the early tie dyes that were shown and discussed were astounding!


Laying on top of various embroidered saris,
this Pre-Columbian textile was astonishing in it's complexity.
The weaver spun the cotton using only her fingers and thigh.

If you ever get the chance to attend something like this and you are really into textiles, and what quilter isn't into textiles, I urge you to go!

29 October 2008

Zen Garden

You all know that I joined ALQS2 (Another Little Quilt Swap 2), don't you? I was in the Art Quilt section. Since I have already received my little art quilt (you can read about it in this post) I thought I should tell you about the one I just sent out.

Like I normally do, I stalked the blog of my 
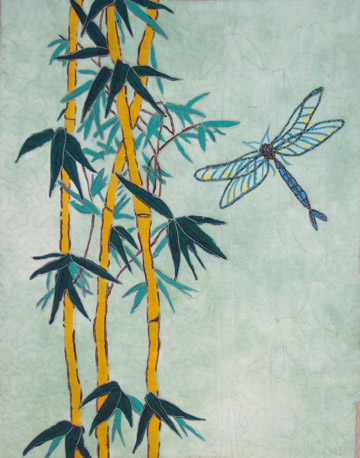
swap partner. She likes nature and when I saw her February 2008 post, I knew exactly what I was going to do. You see, I happen to have 9 of these bamboo tops. Yes, you read that correctly -- nine. This is the only one with the dragonfly on it, however.

Here's the back story on all these little quilt tops. I have a degree in art although I make stupid mistake as in this case. I was taking a design class and as part of my final art project I proposed a king sized quilt that was, in essence, a large nine-patch made of rectangles with a large border popped onto it. As a new quilter, I really underestimated the time it would take to complete the WHOLE project and was only able to get this block painted onto muslin.

But I gave a presentation to the instructor showing the block and the rest of the design and he bought into it and I got an 'A' in the class and graduated. I finished painting the other 8 blocks and completed the top and it became my oldest UFO: 25 years. I once pulled it out of the closet hung it on the wall and thought that if I over-dyed it. would I like it better? I over-dyed it green and still didn't like it. Another time, I pulled it out and it hung on the design wall for months before it FINALLY dawned on me what was wrong: scale.

Scale is one of the principles of design and I had totally ignored it in the big picture of a whole quilt. I did not have a king-sized quilt top with borders. What I had was 9 small quilt tops!! Plus some odd shaped pieces that were former borders.

So, 
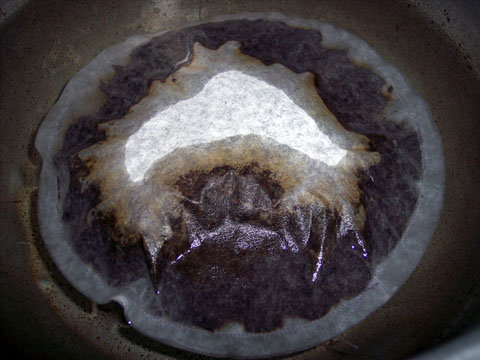
Debbie, received a hand painted quilt, the first in a series called 'Zen Garden'. It is painted using Deka Fabric Paints which are no longer available in the US. I over-dyed it with Procion MX Fiber Reactive Dyes. It is the approximate size of a fat quarter, maybe a bit smaller. I machine quilted more bamboo into the background and then filled in with a stipple. The painted dragonfly is a simple couched embellishment, using two different weights of Kreinik thread.

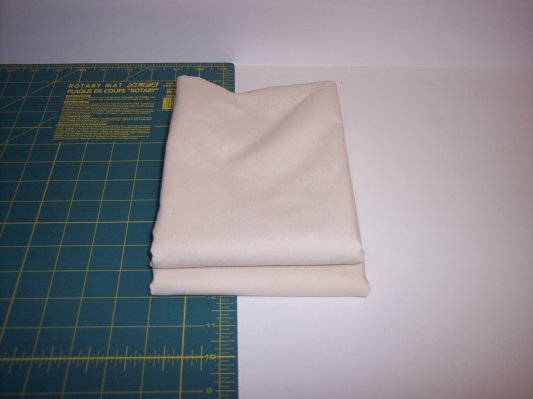
There is one thing you may not have noticed: a lack of a binding. I did not want a binding to catch the eye so I faced the quilt using the bits leftover from when I squared up the quilt. I like the way it turned out.

It is so simple. So zen.

09 September 2008

Kool Aid Dyeing

It's kind of scary to think that Kool Aid (a child's drink) can permanently dye wool. I do not know if it dyes cotton. Somebody out there has probably tried it. Anyone?

I thought I had thoroughly wet the yarn. But obviously, I had not since it 'dyed' in a mottled fashion. It should knit up nice.

07 February 2007

What'cha Got Cookin'?

225041368

Several weeks ago I talked to my favorite coffee barista about getting some coffee grounds for dying fabric. I ended up with a gallon sized baggie of coffee that he usually throws away. He was more than happy to recycle it.

I first stitched two coffee filters together and put 3 cups of fresh finely ground coffee inside and stitched it closed. I ended up with a very large coffee bag reminiscent of a tea bag. I added it to Grandma Vera's green bean pot with 2 gallons of boiling water, turned the heat down and simmered for 5 minutes.

While that was simmering and subsequently cooling in a plastic dishpan, I prepared my fabric. I soaked 1 yard of a white fabric and 1 yard of an off-white fabric in a soda ash mixture for about 5 minutes, wrung the fabric out and placed in gallon sized baggies. (Gotta love those baggies!) I added some really strong coffee. This is not an exact science experiment.

After letting it batch for about 12 hours I rinsed and washed the fabric. Guess what? The off-white (maybe) changed color a tad. The white is now the color the off-white was before this little experiment.

So, I tried again. The fabric was scoured again and then put into the 'dye' bath. This time there were 4 homemade coffee bags that each contained 3 cups of finely ground espresso coffee and the bean pot contained only 1 gallon of water. The resultant mixtue was as thick as mud. I simmered the fabric for 30 minutes, removed it from the 'dye' bath and let it batch in a baggie for 24 hours. After washing it twice in the washing machine I ended up with what you see below. (I had to wash it twice because all those fine little coffee grounds didn't come out the first time.)

226721761
I think it's a pretty nice color, don't you?

05 December 2006

Unexpected Results

Well, hello there! I've been busy with real life and haven't been able to post anything for a couple of days. I went snoop shopping this past weekend. Isn't this cute? and how easy it would be to make! Not that I'll get around to making one. Nope. Won't happen. But I can enjoy it on the shelf.

Remember those paintbuckets of scraps from a previous post? Well, I finally got around to sorting through the lights like I had previously done to the darks. I found some nasty poly/cotton in there that wasn't worth saving and all these scraps of various white-on-white fabrics. Now really. I am planning on using the light scraps in a String-X quilt. If I use them like I plan, then the WOW pieces will look like a hole between the corner triangles. Uh-Uh. Not. Sew, as I was pressing the light scraps I pulled the WOW as I came to them.

I put the WOW into a gallon sized baggie, added a bit of water and the rest of a bottle of OLD Rit tan dye and squished it around. I put it on the cold concrete floor in the basement next to the washing machine to batch. I got to thinking that the dye I used was really old and maybe wouldn't work very well so I bought another bottle and added about 1/3 of it to the baggie. And let it batch for several more days.

Now, I never said this was a scientific process. But here are some of the results of this overdying. The first photo is typical of what I expected. But the second photo shows some unexpected results. Oooo, Oooo. I wish I had more of that center piece! And what happened to 'tan'? The photo isn't quite true, because the white ink actually turned sliverish-gray. Way Kewl! And sew, my lights became mediums and are now in the dark bucket.