Showing posts with label design. Show all posts

29 October 2012

Design Wall - October 29, 2012

I must confess. I did not like the angel block in the Baltimore Christmas quilt pattern. Not that there was anything wrong with it, I just did not feel that it went with the rest of the quilt. Can you remember all the blocks I have posted up to this point? If not go here to my flickr account: they are all there.

Good, you are back. Now go here to P3 Designs and look at the angel block. Not only are we talking itty bitty pieces here but it is the one of two times that pink shows up. The dolly's dress is pink and I always wondered if the angels were dolls or was the dolly an angel? It is also the only religious seeming block while all the other are very secular.

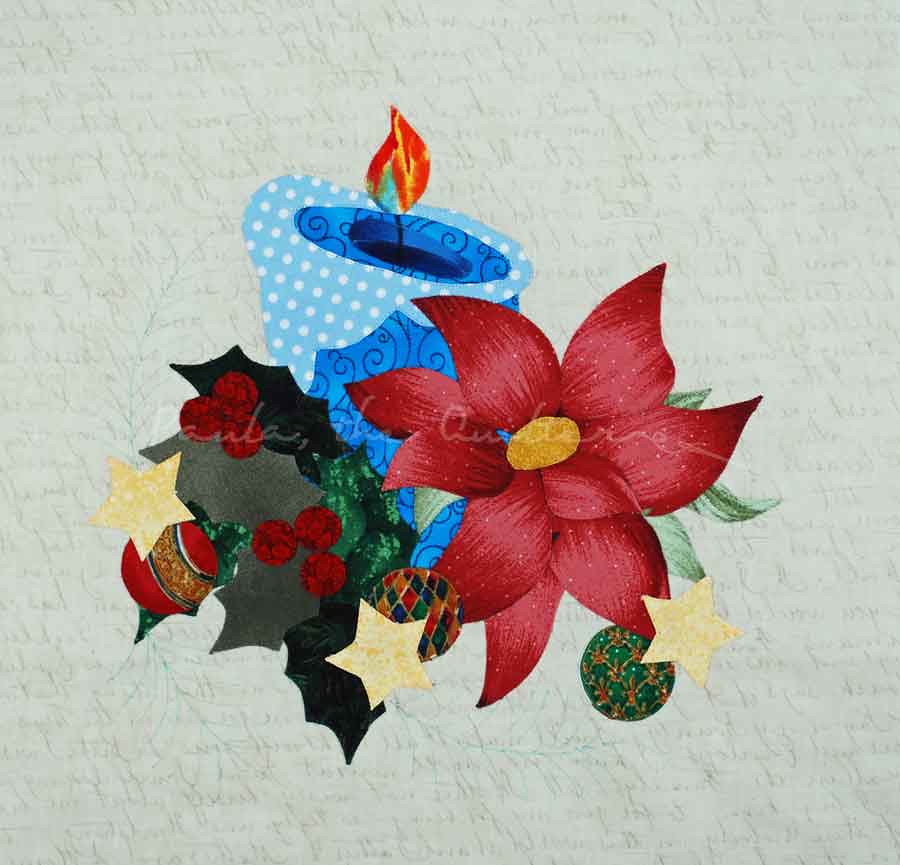
I studied the blocks that I had finished and realized two items that are commonly associated with Christmas were missing. There were no candles or poinsettias.So I fixed my dilemma by designing my own block to replace the angel one. Not only did I include a poinsettia and candle, I pulled from the other blocks and used ornaments, stars and holly. The pine boughs are once again drawn onto the background.


DSC_1701-th

I have already started on the 24"x24" square medallion center but it will take a bit longer than the 12" blocks.

Oh, and I finally figured out how I am going to shade the applique. I have  problems with a heavy hand when I try to use paint, so all along I've been thinking of pencils or ink. After hours of online research, I found this tutorial: Colored Pencil w/ Applique. The colorless extender is in the mail. Problem solved.

For more design walls visit JudyL at PatchworkTimes.com

06 September 2012

Quilting Patterns at your Feet

Do you ever notice the quilting patterns that are quite literally at your feet? I see four different sized hexagons in this metal cover. And look at that wonderful gear shape in the center!
Now look at an even older version of this cover. The design is more open and airier and the smallest component now looks more teardrop shaped than hexagon. Wouldn't it be fun to play with these designs using fabric?

21 December 2007

Bullseye! Another Lesson

221507494 

We've all seen them. The quilt ladies at the shows wearing the vests and jackets with the quilt block smack dab in the center back. Like a target. I'm guilty of this.

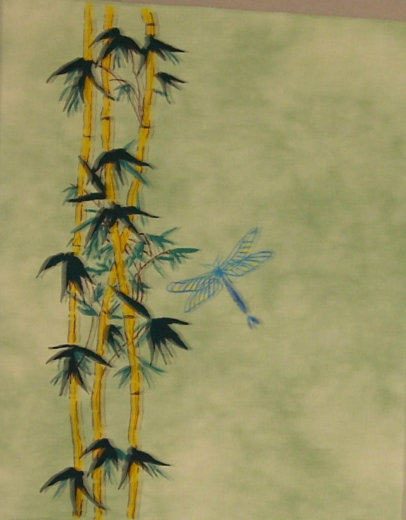
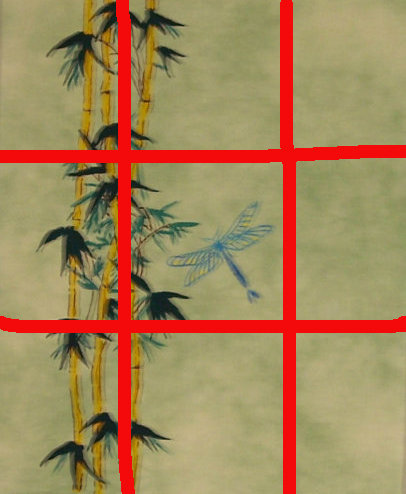
Ready for another lesson? I'm going to use the same overlarge quilt blocks (with clickable images for a larger blurry view) used in the previous lesson on proportion because there is another problem with one of the blocks. See the dragonfly smack in the center? Bullseye! I should have remembered the rule of thirds. Good photographers use this rule. I have used it, but for some reason forgot it in this instance.

228779503
See how I have divided the block into thirds both vertically and horizontally? Notice where the dragonfly is: bullseye! When you are taking a photo imagine this grid on top of your image and move your camera so your subject falls on one of the intersections.

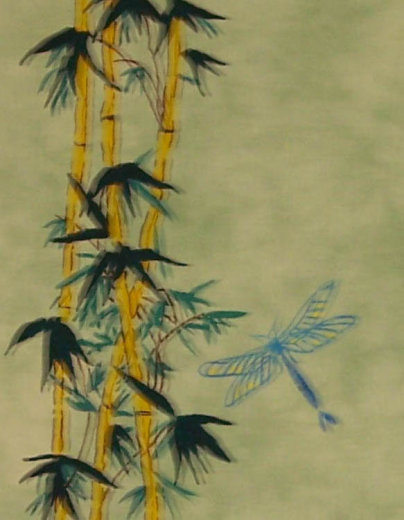
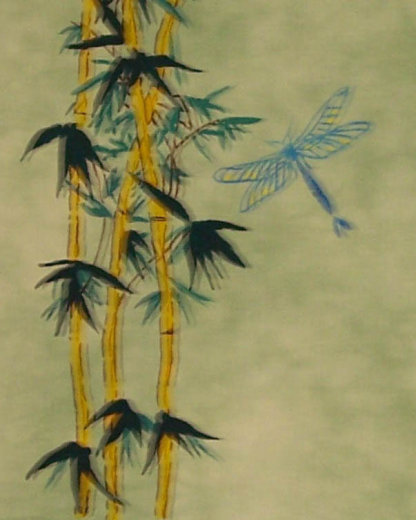
You can see how I've cropped this block 2 different ways in the next 2 images. So which one would you use? Although I really like the lighter area that is at the bottom of the second image because it reminds me of a light source or a bounced light beam, I'm not sure I like the dragonfly flying off toward the edge. And in the image with the dragonfly at the bottom, there would need to be something at the intersection right above the dragonfly (some fancy quilting or embroidery?) to draw the eye up and then off the edge.

221508038

221508037
Update: Shelina has a valid comment in that rules are made to be broken. But remember that is one block is the center block of an overly large nine-patch are really is a target. I have totally re-purposed these blocks and am making small wall hangings.

31 October 2007

WIP Wednesday - October 31

I spent some time over the weekend working on the new blog banner. I've got it down as a template and can now change the photo easy peasy.

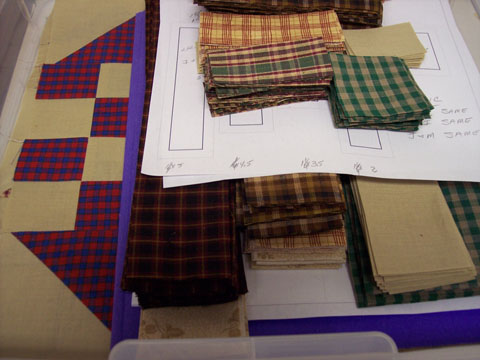
I also went into the sewing room and cut logs for the Log Cabin blocks that I plan to make for the alternate setting blocks in the Homespun BOM. The paper is my EQ6 template sheet that I printed out so I could figure out the size I needed to cut the logs. I should have used EQ to draft the 6" version of the block you can see under the purple folder and the logs. That block is the 1930's Block. Now I need to sit down and start sewing the log cabin blocks together.

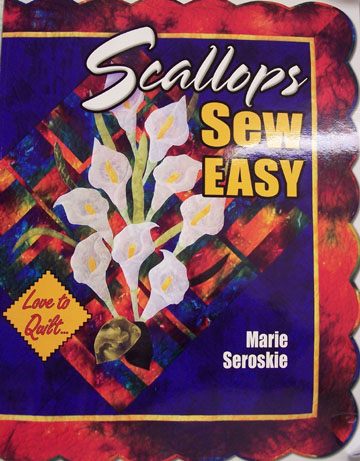
I've been waiting for this book to come. I pre-ordered it from American Quilter's Society in August for a printing delivery date in September. But it was backordered and didn't get delivered until yesterday. I wanted it so I could learn how to draft my own scalloped borders. It is a very quick and easy read. I wish I could have checked it out of a library somewhere rather than spend the money on it. That calla lily quilt on the cover is a pattern inside the book.


Remember when I talked about the incredibly fuzzy photo of the basted quilts? Well I finally got a good one. That purple in the center is part of the backing of 'Dance!' The quilts on either side of it are the Skillbuilder panels I purchased and talked about in a previous post.

I bet Sweet P over at Coffee Time Quilt Studio on the World Series. Loser was to give a goodie bag to the winner. So Sweet P, you can expect a package at the beginning of the week.

I just realized that I let my third blogiversary slip by. Boohoo. Oh well, but I'm also coming up on my 300th post and will do something special as a giveaway on that post.

28 October 2007

Ruana Pond

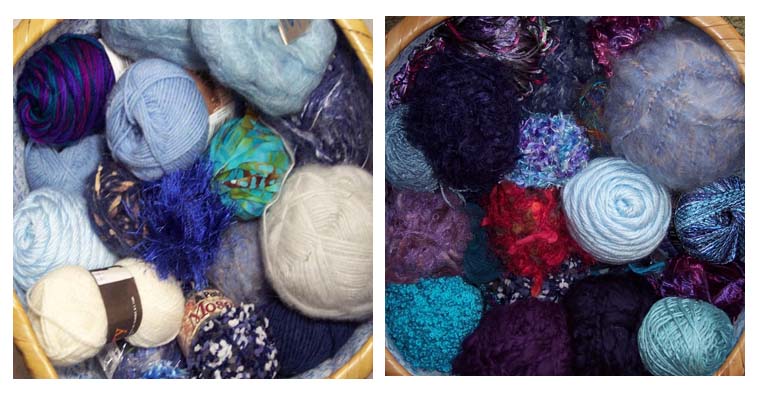
I went around the house and gathered up the blue yarns. Gulp. (Did I every tell you that blue is my favorite-ist color?)

Here's the pond for making my ruana. So the photo on the left is the first draft of yarns and the photo on the right is current as of this morning. It's a nice stew of yarn isn't it? The yarn consists of alpaca, wool, acrylic, bobbles, mohair, fun fur, cotton and more. See that skein of really light blue in the center? That is going to be used as the second strand with some of the weird lighter stranded yarns. I've got some navy to go with the darker colored fun fur-type yarns. I've pulled the blue/green batik (yes it is actual batik fabric cut into 1/2" strips) and the light blue mohair from the first mix. I've added purples and magentas. I think it needs a bit more magenta/red. Don't you? Or maybe a touch of green?

I'm going to get the book Folk Shawls by Cheryl Oberle because I'm a sucker for shawls and, more importantly, there is a pattern in there for a ruana. Want to see the one I'm going to do? Go to this link (http://the-panopticon.blogspot.com/2005/12/viva-ruana.html) and read the whole post, 'cause there's photos!

Imagine this out of fabric: 48" square with a slit from one side to 5" shy of center. This is a ruana. I'll start this one day, but I think it needs to age a bit longer. It will be a nice easy knit in garter stitch but a long project time-wise. Of course, there's always the possibility that I'll hate the pond and totally start over with different yarn.

06 August 2007

Fabric Bleeding Update

I'll be scarce for a week or so: I had company over the past weekend (my brother and SIL) and the annual sculpture show is this coming weekend. (Want more info on the sculpture show? Go to this website. ) Anyway. It always takes me a week to get back into my daily routine after the show, especially if it is hot.

But I did want to give you an update on the bleeding fabric in the Banana-fana quilt. Here's what I've done:
Results? Nada, zilch, nope, no change to the spots, but the extra Color Catcher sheet did catch a little bit more dye.

So it's back to the fabric paints. I found a good tree this morning on my walk from the parking lot to the studio. It has good leaves. I'll have to wait to do this because the leaves need to be soft and pliable to print with so picking and painting need to be done in one day. I'm going to keep my eyes open for other leaves of the area to use for printing.

Tata for now. I'll try to check in occasionally.

01 June 2007

Watching Paint Dry

256660501

Happy Friday to you! I'm sorry that I've been remiss in blogging this week. But I'll try to make up for the lack of posts. Probably all in one post *grin*.

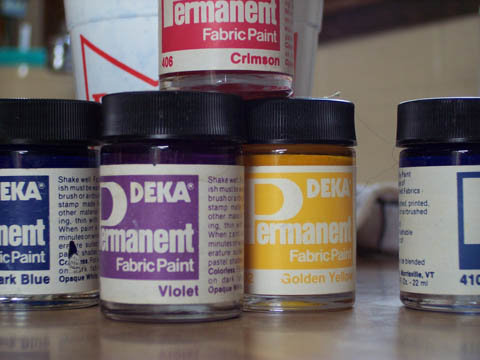
See the little paint pots in the photo? That paint is about 30 years old. And still good. I hearts me my Deka paints. These are the paints I used to paint the quilt in question in the post, Proportion. For mixing my paint, I use those plastic beer cups that come with a keg of beer.

So what was I painting? Well, since I made such an unfortunate choice of fabric to combine with the focus fabric for the Challenge Quilt and that choice resulted in a large proportion of the focus fabric ending up as the backing for the quilt, I needed something quite spectacular for the front. And as I'm running out of time it needed to be one piece. I searched and searched for what I had in mind and came up empty handed. What's The Quilter to do? Why, paint her own fabric, of course.

256660503
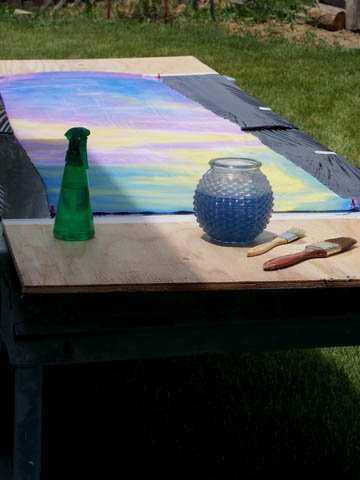
In the style of Mickey Lawler's Skydyes, I decided to paint my own background. CarGuy set up the sawhorses and board. I covered it with a trash bag so the wood would not absorb all my paint, and then went after it. This picture shows the fabric drying before I put on the next layer of paint to darken some areas and change the color in others. I apologize for the quality of the photo. The wind was blowing, it was sunny and I just could not get a quality shot. You will see more of this fabric when I actively start making the Challenge Quilt: Poetry in Motion.

As I was waiting for the paint to dry between layers I kept hearing this sound. A humming that kept getting louder and louder. So loud, in fact, that it drowned out my inconsiderate neighbor's radio. I turned around and saw thousands and thousands of bees just swarming in the air over my back door. Eek! They came out of nowhere and just as quickly disappeared. Totally bizarre!

Oh, and speaking of stinging insects. Tuesday I went to the commercial drive up window at the bank, rolled my car window down, stuck my arm out to place the deposit in the teller's box and was stung just above my elbow. Now, I have never been stung by a bee, hornet, wasp, yellow jacket, etc. By the time I got back to the studio, my elbow was itchy, itchy, itchy. By Wednesday morning it looked like I had two elbows on my left arm. I was also having a systemic (whole body) reaction to the sting: nausea, diarrhea, muscle aches and dizziness. By mid-afternoon I was better. Now I know what kind of reaction I get: not good.

I have also been remiss in labeling my quilts. Bad Quilter! So I visited all the quilts in my house and labeled the five (5) that did not have labels. There that is done and off my mind.

30 January 2007

Convergence

226753620

By popular request, here it is, my Convergence Quilt. It's clickable for a larger view. The color is a little off in the picture. Now that I see this on screen it's growing on me.

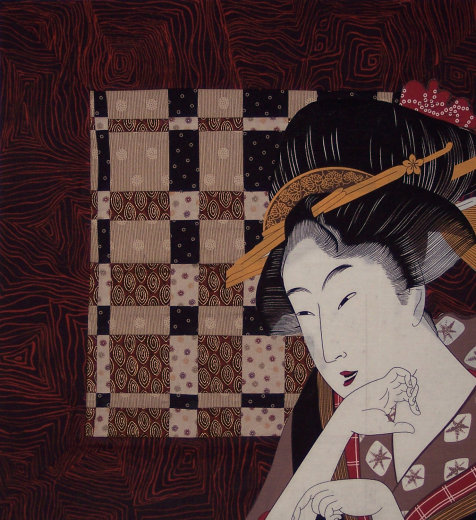
I have had this small quilt done for about a year. It's only about 12"x14" or so, I'm not sure since I haven't measured it. I've had these Asian lady panels for about a month. And something clicked. I fused Heat 'n Bond lite (it's what I had in the studio) to the back of this lady and cut her out using my Xacto knife. Amy, haven't we had a conversation about Xacto knives? I was careful. I fused her onto the quilt.

Oops! there was show thru. I heated her back up an pulled her partially off the quilt and cut out the quilt behind her. Now I had a partially fused lady on a partial quilt. I grabbed a piece of batting and placed everything on it and fused it back down onto the quilt and onto the batting.

Oops! See there by her nose? And there is some kind of line running down her face. I also made the wrong choice of batting.

So here's my experiment in how many times you can heat and reposition Heat 'n Bond lite. I'm going to reheat the portion of the lady that is fused directly to the batting so I can remove the batting and replace it with white. That will take care of the black flecks that are showing through. I don't know what the line is. It is sooooo straight I don't think it is a thread. I wonder if it is on the fabric itself? And that area at the nose? That is part of the background that is showing through. I'll figure out something in that area. Also (and I just saw this one) there is an area up on her forehead right at the hairline. I'll keep you posted.

Even if it doesn't re-stick to the new batting there is always spray basting. And yes, that is the way I've cropped the actual quilt, not the picture. I wonder how I should quilt it? Any suggestions?

Update: I reheated the fusible and peeled it up again. I placed it on a white batting which worked better than the off-white with flecks. Then I fused it down again. If you are keeping track that is 3 fusings and 2 peels so that Heat 'n Bond Lite fusible has been heated 5!!! times. Note to self: don't use scraps of fusible that have lines drawn on them, the lines transfer to the fabric and won't come off. Sigh.

09 January 2007

Proportion

Are you ready for another design lesson? Fair warning: the images are intentionally blurry. One element of design is proportion. Proportion is the relationship in scale between one object and another, or between a whole object and one of its parts. The issue here is the relationship between an element and the whole. Does that make any sense to you? I have a perfect example.

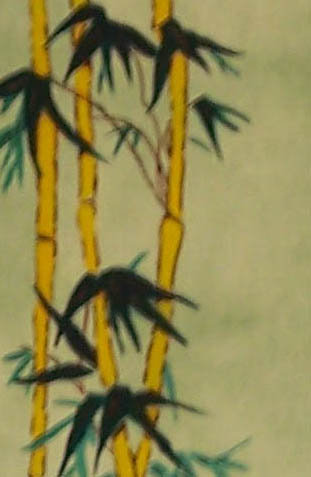
bamboo1

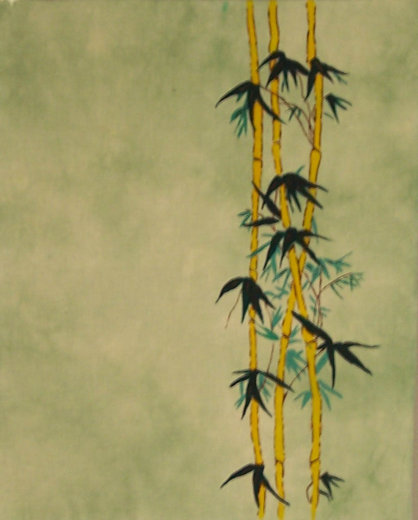
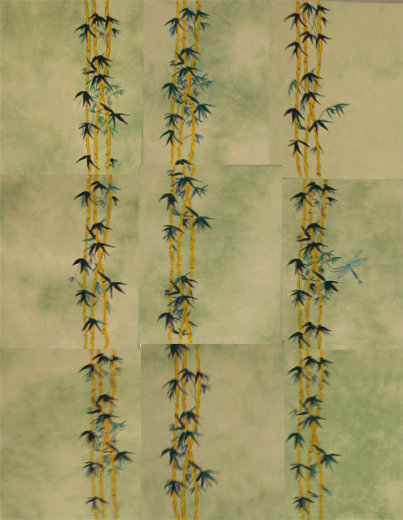
In 1984, I had to do a final project in a design class in college. I, of course, was going to do a quilt. I painted my design on one block. As luck would have it, the block size was 18x22. A fat quarter size long before the term FQ. I only had enough time before the end of term to do one block. The instructor liked the concept and the one block. I got an 'A' in the class. Here's the block. As always, the image is clickable. When I presented this to the instructor it was painted with Deka* fabric paints on unbleached muslin. The color range of the paints was quite limited and I ended up mixing some to get the color I wanted for the lighter leaves. After I graduated, I made 8 more of these blocks and sewed them together into a very large 9-patch. And then set it aside to age.

Fast forward about 10 years. I dug this out, hung it on the design wall and studied it. What was it about this that bothered me? I figured it was the color so I overdyed it with green Procion dyes and ended up with this. Better, but I still didn't like it. Back it went to the shelf.

bamboo2

I recently dug it out again and put it back up on the wall. I was not ready to release it yet. I liked it but there was something about it that bothered me. I studied this thing for months until it dawned on me that the scale was off. The scale of each individual block (element) was good for itself but when you put that element with 8 others the scale was too small.

How to fix it? Well, I considered adding more bamboo in a larger size on top of what was there by appliqué. But I didn't really want to go there. My solution? Go back to the first picture. You can see that the block works like that. I took this top apart. I now have 9 mini quilts sized 18x22.

bamboo3

Or, and here is where a program like Photoshop is handy, how about this? Do you know what this is? This is a 4x6" postcard that I cropped out of the 18x22" block. Can you see where the proportion comes into play? The whole quilt was "off". The smaller 'block' works as an individual. But trimming it down even further is the best solution for the scale of the bamboo. And yes, I am going to make some postcards but I am also going to make a triptych. I have many choices.

Was this helpful? Should I continue on more design principles?


*Deka fabric paints are no longer available

Update: I was asked what is a triptych? Wikipedia has an excellent definition. Short and sweet: is 3 panels. I'll do them side by side without hinges *smile*.