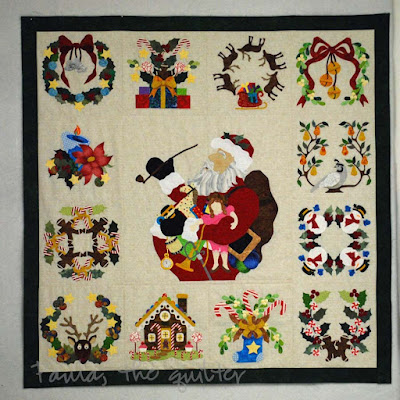
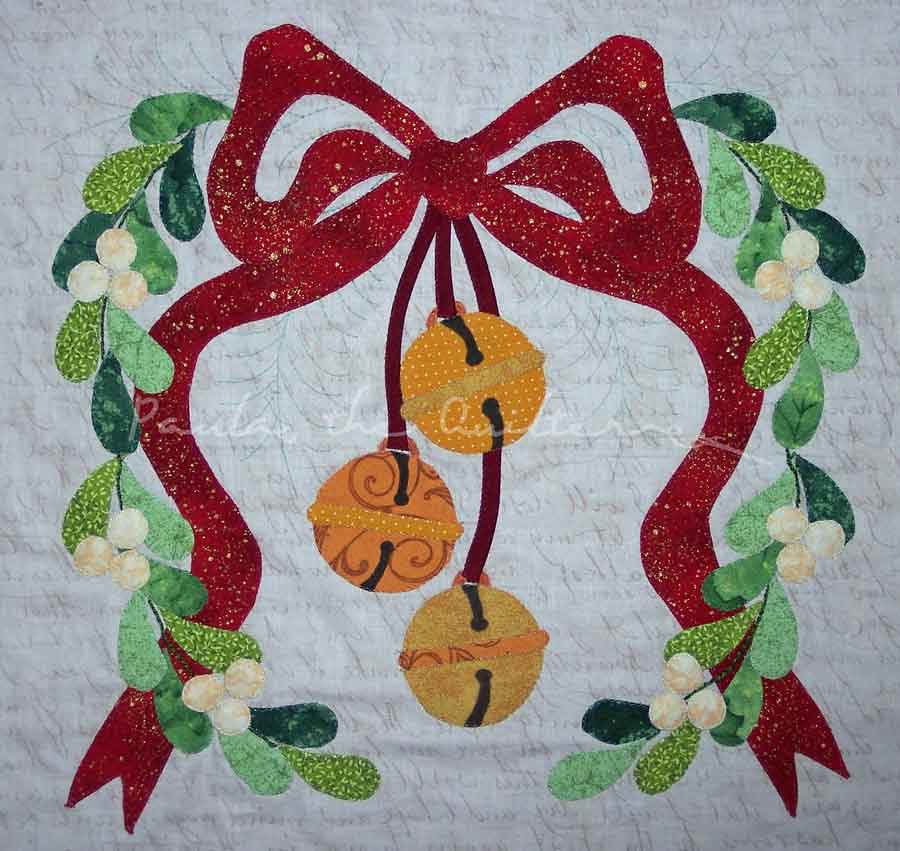
Well, I have a major accomplishment! This quilt is FINALLY done! As in bound and labeled. I started this quilt way back in 2012, January I believe. It has taken me seven years for completion. I'm happy with it and glad it is finished.
I modified the pattern just a bit by removing the angel wreath and adding the candle. All the applique is invisible machine applique and I quilted it myself. I love how this has turned out!
Showing posts with label BOM-Baltimore Christmas. Show all posts
Showing posts with label BOM-Baltimore Christmas. Show all posts
31 May 2018
19 March 2017
The Quilt
Well. That didn't work.
That stinking green inner border bled.
That effectively takes this quilt out of any show or competition. Yes, I had planned on putting it in one or two. Not now.
I went to the store and bought 3 boxes of Color catchers and hand basted them over the border and washed the quilt to help remove more of the color. I air dried the quilt. That worked, somewhat.
Then I found some of Grandma's Secret Spot Remover. I used it on two of the lighter areas and it took them out. So I moved on to a darker spot. I've been following the directions: rub Grandma's into the spot and wait 5-10 minutes before washing. Except instead of washing I have been placing the area over an empty bucket and pouring water on it until it drips out the back side. Then I let it air dry. It is working, but oh so ever slowly. I have almost gone through a whole bottle and the spot is still there.
My next thing to try is a bleach pen. Yes, I know this is harsh but....
I bought a brand new bottle of hydrogen peroxide. Did you know that hydrogen peroxide neutralizes chlorine? One part hydrogen peroxide to 10 parts water in case you want to know. The reason I bought a new, unopened bottle is that hydrogen peroxide, after opening, looses it's effectiveness over time. I want this to be as strong as I can get it.
Here is where this is today. Picture #1 is where I started. Picture #2 is with Grandma's Secret Spot Remover. Picture #3 is with the bleach pen. I think is is good enough to hang on my wall but not for shows. Comments?
 |
| Picture #1 |
 |
| Picture #2 |
 |
| Picture #3 |
07 January 2017
There Is A Quilt There -- Somewhere
Really there is! I am soaking a quilt per the instructions from Vicki Welsh's tutorial: Save My Bleeding Quilt. The water has already changed color. I am soaking it for 12 hours because I want all that dye to release. I'll keep you updated.
27 May 2013
Well, the applique is done
This quilt is a very long-term project. The applique is done, woohoo! In fact, the painting and colored pencils are done too! What was painted, you ask? Well, the stars seemed to blend into the background because the values were too close. So out came the Jacquard Lumiere paint and a flat tipped brush. Using a dry technique, the paint was put on the edge and pulled in toward the center of the star. Some turned out better than others.
Next up, is quilting and I will have to think on what I want to do with this. I am thinking just a simple straight line or grid, but I don't know yet. Do you believe I have been working on this since the end of June 2012?
What's on your design wall? For more eye candy, visit Judy's Patchwork Times blog.
06 May 2013
Design Wall Monday - May 6, 2013
Apparently, I am not happy unless there are multiple projects going. This is how the studio looked when I closed the door yesterday. In fact, I stood in the doorway to take these photos.
In the lower left of this photo, the counter that doubles as a cutting surface is visible with the next border of the Baltimore Christmas BOM ready to stitch on it. Beyond that, is the old Singer treadle machine currently being used for string piecing. The foundation papers are sitting to the right of the machine and just on the back corner of the treadle cabinet is the growing stack of 'blocks'. As a string gets pulled from the basket, it will be sewn to the foundation paper, unless it is a longer red or blue one as evidenced from the growing pile on the floor of a future QOV string quilt.
Behind the treadle is the Bernina that is set up for the machine applique of the Baltimore Christmas BOM. I don't want to mess with the settings, that's why I'm using the treadle at the moment. And there is the pile of the purple knitted jacket waiting for the hand-stitching of the frog closures to complete it. On the back corner, is the box of fabrics used in the Baltimore Christmas BOM.
Progressing a bit further around the room, the hand quilting frame becomes visible. It is currently in use as a hanger for six (6!) basted quilts awaiting quilting. The oak rocking chair is blocking the view of a small side table that currently holds a hand piecing project and just go to this post for the design wall that is behind the rocking chair and hasn't changed in a while.
And there you have the state of my studio. Did you keep track of the projects? If you didn't, the number is 12.
22 April 2013
Inner Border On
There's nothing like taking your time to do something correct. It took two days to get that first border on. Why?
When I first started this project, I cut the background fabric for the outer border first. That way the borders would be cut out of one piece of fabric with no seams. That makes sense, right? I pinned a note to the two different sizes and hung them in the closet.
Okay, fast forward to making the inner border, the green one you see in the photo. I referenced the notes on the borders hanging in the closet and cut the green fabric accordingly, assuming that I cut the outer borders for miters.
You can see where this is going, right?
The green borders were stitched onto the outer ones so both borders could be mitered at the same time. Once the borders were hung in place around the applique center, I realized that the outer borders were not cut long enough for a miter and, therefore, the inner borders weren't either. Oh dear.
Out came Jack the Ripper and I spent Saturday, carefully removing those seams and then pressing both borders flat. On Sunday, I was able to get the inner green border stitched onto the center. Yay me!
If I had only paused to remeasure both the pre-cut borders and the center. If I had only written down my intent on the borders. If only, if only. But all is well now. I was bemoaning that the quilt would not have lovely mitered corners when inspiration struck. I pulled out a recently quilted, but not bound, applique quilt and checked the borders. Yes, I had done a straight border where the top and bottom were applied first and then the sides. With an applique border, you don't really see the seam at the corner because the applique disguises the seams. Boy, did I luck out.
And another plus: I can do the majority of the applique on the border before I stitch it onto the quilt. It's a win-win.
I'm linking up to JudyL.
15 April 2013
Design Wall Monday - April 15, 2013
There is a bit of progress to show on the Baltimore Christmas applique quilt. The blocks are done and sewn together. The two fabric pinned to the wall above the blocks were the choices for the inner border. When I stuck that green stripe up (see it there to the right?) the mottled green said to chose it. The red is going for another project, whatever that may be. I love that green stripe for the binding, don't you?
I apologize for the crappy photo, but I was in a hurry this morning. 10 inches of snow meant I needed to leave the house earlier to get to work. My little Kodak Easy Share camera doesn't have the stabilization that my big Nikon has. But you get the general idea.
The next step is borders. There is a 2" inner border, hence the green, and a wider appliqued border. All embellishments including buttons, beads, embroidery and whatever will happen after the quilting. I am really looking forward to both the quilting and the embellishment. I'll be doing the quilting on my DSM.
Do you want to see more design walls? Then visit Judy at Patchwork Times.
01 April 2013
Baltimore Christmas Quilt Update
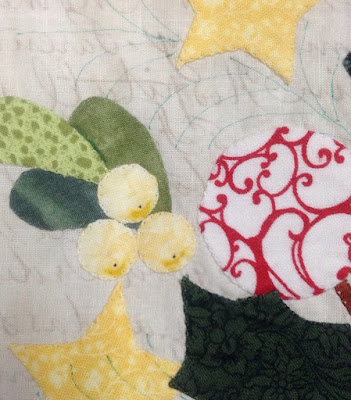
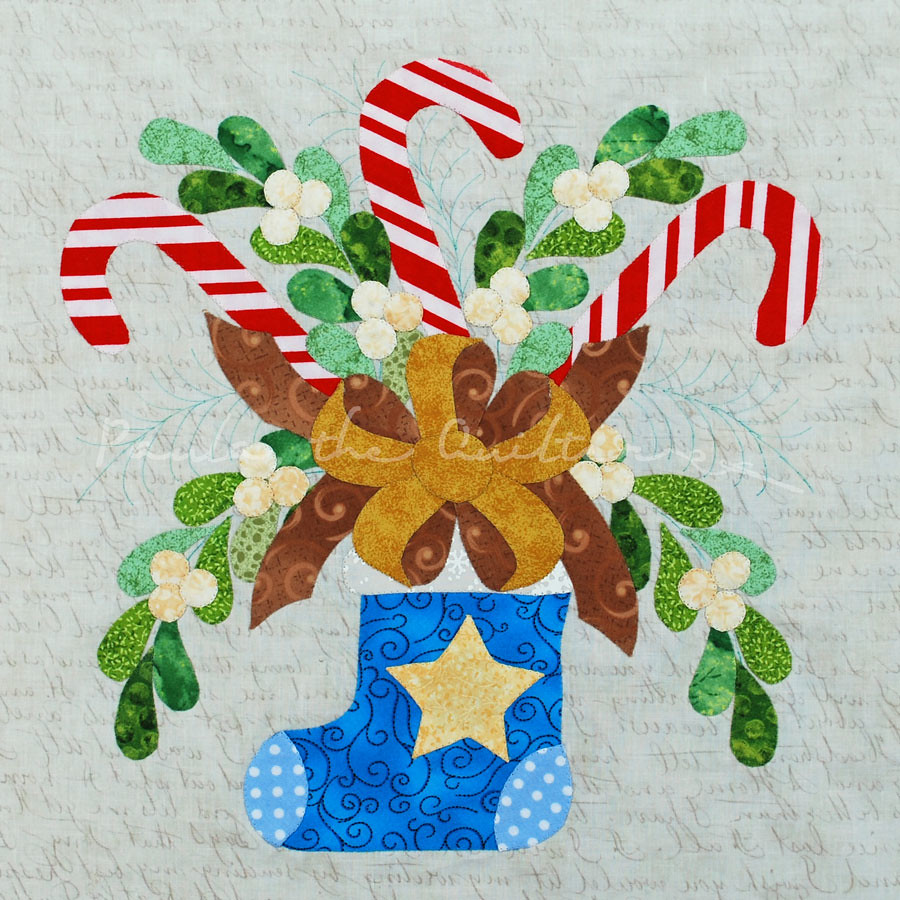
It's been awhile since I gave an update on the Baltimore Christmas Quilt. All the blocks are appliqued and then I stalled out for a bit. But today, I was able to do the next step. It's a subtle thing but makes a world of difference. See those yellow berries? I took a .01 black Micron Pigma pen and made a dot. Then I took out my trusty Prismacolor pencils and added a bit of shadow, set it and Voila! I was going to paint it, but decided to use colored pencils because I have better control and the control-freak in me needs that.
Now the next step is to trim the twelve 12" blocks and the center 24" block to size and stitch them together. That, however, is going to wait. My Bernie is going to the spa tomorrow for her annual check up so the sewing room will be a bit quiet.
Oh, and see those faint green lines? Those are the embroidery lines for the pine boughs. Just thought I'd let you know *lol*!
For other design walls, visit Judy L's blog.
And here's a link to my Flickr set of all the applique blocks I've done for this quilt.
17 January 2013
What's Been Happening
around Casa del Quilter? Well, not much. And really not much to show.
There was such a high volume of spam comments that I had to change the settings on the comments to not allow anonymous comments. I hope to be able to go back to normal in a few months.
All the blocks for the Baltimore Christmas applique quilt are appliqued. Yay! As part of the technique of the machine applique, the blocks needed to be soaked in warm water. That is when disaster struck.There was fabric bleed on two of the blocks. Oh no! Thanks to this blog post by Rose Marie disaster has been averted. The next thing is to trim the blocks to size and put them on the design wall. Maybe I'll have something for Design Wall Monday next week?
Have you ever knit a blanket? That's what I am doing in the evenings. It is really boring knitting. Really. Boring.
There's a new folding table in my unfinished basement laundry room. It looks like the ones at a laundromat. As I was moving stuff out of the way for this much larger table, I found the china tea set that I had as a child. I searched the internet and found a free photo of a tea party that reminds me of the ones I used to have with my dolls and stuffed animals.
Not very exciting stuff, is it?
20 December 2012
17 December 2012
Design Wall Monday - December 17, 2012
Wow! It's been a whole week since there has been a post on this blog. So sorry, but business first you know.
Work is progressing on the Baltimore Christmas quilt. The pieces for the borders are in the prepping stage. I've linked to the designer's page so you can see the border.
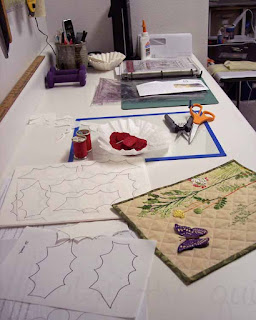
This is the counter in the sewing studio. Working from the back of the photo you can see
I'm linking up to Judy's blog, PatchworkTimes for design wall and BOMs Away Monday.
Work is progressing on the Baltimore Christmas quilt. The pieces for the borders are in the prepping stage. I've linked to the designer's page so you can see the border.
This is the counter in the sewing studio. Working from the back of the photo you can see
- the desktop Ottlight for obvious reasons
- the empty envelopes, recycled from bills, that are used to hold the applique pieces cut from the stabilizer
- a bottle of Elmer's school glue used to glue the applique pieces onto the background
- a stack of coffee filters used as catch alls and can be stacked on top of each other
- a beautiful pot used for holding pens and pencils
- the 3-ring notebook with the pattern
- the last envelope with the prepped stars for the border
- a piece of glass with blue taped wrapped edges for putting on top of the glued applique while the glue dries
- two 3-lb purple hand weights to put on top of the glass for added weight
- 2 pair of paper scissors (very important! only for paper)
- a coffee filter filled with 48 1.5" red fabric circles, a needle and the thread all ready to gather for use as the berries in the border
- the stabilizer with the holly leaves ready for cutting.
Tip: The leaves at the very bottom of the photo were traced from the pattern and then scanned into CorelDraw. Once in the drawing package the bitmap was traced to turn it into a vector drawing so they could be edited. Then the line weight was changed to hairline and the color from black to lavender. A total of 64 leaves, 32 pointing left and 32 pointing right) were needed so I plopped the leaves in pairs, 6 to a page, and printed 10 pages of holly leaves onto stabilizer. The lavender ink is so faint that when the quilt is washed it won't even show if it DOES run. But because it is so faint, I use one of the FriXion pens to trace the image because the black lines will disappear when it gets heated with an iron. - and the most recent AAQI Priority Quilt finish: notice the dimension to the butterfly?
I'm linking up to Judy's blog, PatchworkTimes for design wall and BOMs Away Monday.
10 December 2012
Design Wall Monday - December 10, 2012
Here is the center medallion of the Baltimore Christmas quilt. I did a massive 'push' to get this done over the weekend. This block has over 100 pieces in it and was a bit like a jigsaw puzzle to put together. Like before, all the embellishments will wait.
Next up are the borders and I hope to have them done by the end of the year. Makes it sound a long way off, doesn't it? But in reality, it is only 21 days away.
I need to find a long-arm quilter who will do custom quilting on it. Any suggestions?
Visit Judy for more design walls.
Next up are the borders and I hope to have them done by the end of the year. Makes it sound a long way off, doesn't it? But in reality, it is only 21 days away.
I need to find a long-arm quilter who will do custom quilting on it. Any suggestions?
Visit Judy for more design walls.
03 December 2012
Design Wall Monday: December 3, 2012
Here it is, the first Monday in December and I actually have a holiday themed design table. I pulled back the overlay with the cartoon drawing on it, so I could take this photo. It doesn't look like I've accomplished much but the hobby horse and the house (with the wild striped paint job) are the latest editions along with the bottom of Santa's suit. I still have to stitch down the horse's mane and the bridle. I used a polyester 'velvet' ribbon for the bridle. Want to see the wee bit of progress from the last time? Click here.
For other design walls, or tables like mine, go to Judy L's Patchwork Times blog.
29 October 2012
Design Wall - October 29, 2012
I must confess. I did not like the angel block in the Baltimore Christmas quilt pattern. Not that there was anything wrong with it, I just did not feel that it went with the rest of the quilt. Can you remember all the blocks I have posted up to this point? If not go here to my flickr account: they are all there.
Good, you are back. Now go here to P3 Designs and look at the angel block. Not only are we talking itty bitty pieces here but it is the one of two times that pink shows up. The dolly's dress is pink and I always wondered if the angels were dolls or was the dolly an angel? It is also the only religious seeming block while all the other are very secular.
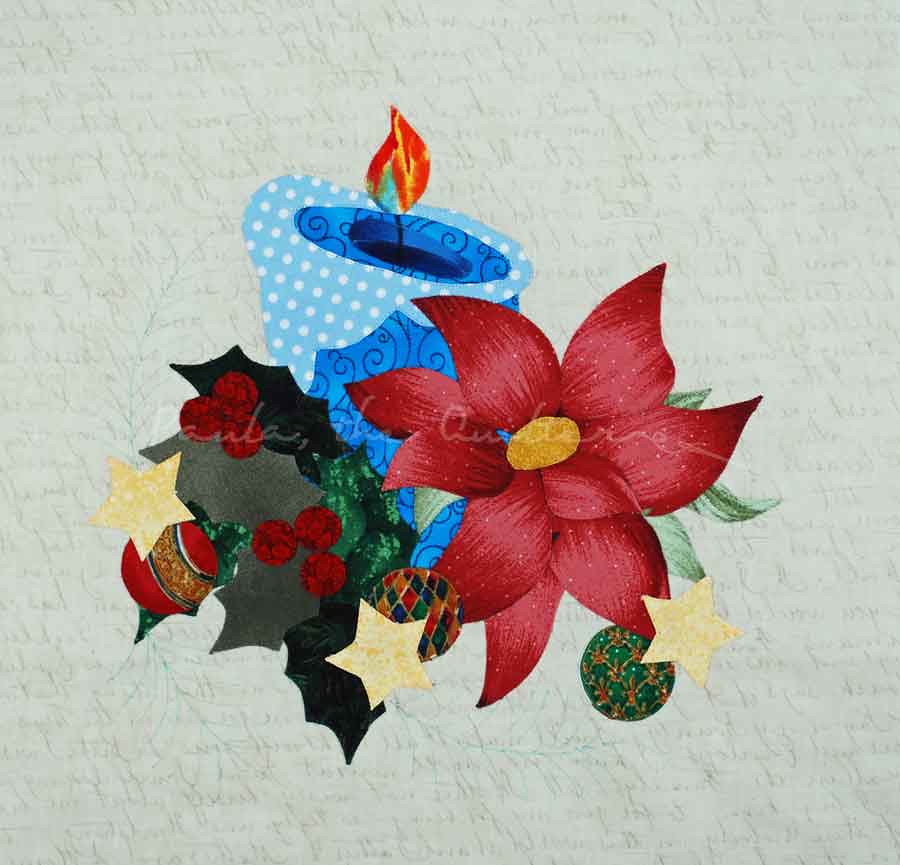
I studied the blocks that I had finished and realized two items that are commonly associated with Christmas were missing. There were no candles or poinsettias.So I fixed my dilemma by designing my own block to replace the angel one. Not only did I include a poinsettia and candle, I pulled from the other blocks and used ornaments, stars and holly. The pine boughs are once again drawn onto the background.
I have already started on the 24"x24" square medallion center but it will take a bit longer than the 12" blocks.
Oh, and I finally figured out how I am going to shade the applique. I have problems with a heavy hand when I try to use paint, so all along I've been thinking of pencils or ink. After hours of online research, I found this tutorial: Colored Pencil w/ Applique. The colorless extender is in the mail. Problem solved.
For more design walls visit JudyL at PatchworkTimes.com
15 October 2012
Design Wall - October 15, 2012
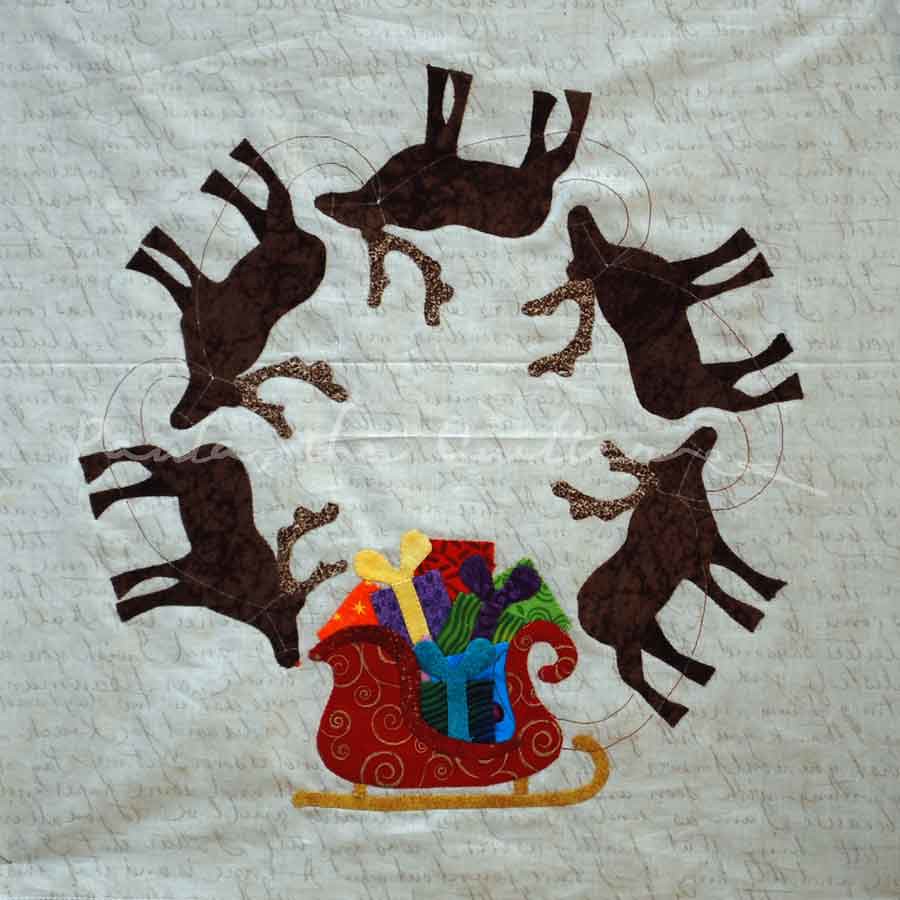
Oooffda! Here's another finished block.
You can barely see the reins and harness on the reindeer but, once again, those will be embellished after quilting. Are you working on this quilt? I will warn you about the packages in the sleigh. Since I am machine appliqueing this, I found it fiddly, fiddly, fiddly. Put a little piece of fabric down and then take it to the machine and stitch. Go to the light box and put another little piece of fabric down and then take it to the machine to stitch. My little assembly line went right out the window when it came to those packages. But it is done now so all is well.
One more block in the 12" size and then I can start on the center medallion.
Want to see more quilters' design walls? You'll need to go to PatchworkTimes.
08 October 2012
Design Wall Monday - 10/8/12
Here's another block on the Baltimore Christmas quilt. Progress is definitely being made. Only two more 12" blocks before I start the center medallion.
Want to see more Design Walls? Please visit JudyL at PatchworkTimes.
24 September 2012
Design Wall Monday - September 24, 2012
The 'fur' at the top of the stocking is too light but I am not going to take it out. I'm thinking a bit of paint might darken it. Must use a very light hand. I'm closing in on the end of the smaller blocks. Keep in mind there is the center medallion and borders too.
For more design walls please visit Patchwork Times.
17 September 2012
Design Wall Monday - September 17, 2012
The Baltimore Christmas is being whittled down to size. Here's another block. If you click on it, hopefully you can see the faint lines where the embroidery and buttons will be stitched.
I got started on the next block, the Partridge, but I made a major mistake on the tree and had to throw half of it away. Oh, well. It's not like I don't have any more brown fabric. LOL!
For more Design Walls, please visit Patchwork Times.
And you can go here for BOMs away Monday.
I got started on the next block, the Partridge, but I made a major mistake on the tree and had to throw half of it away. Oh, well. It's not like I don't have any more brown fabric. LOL!
For more Design Walls, please visit Patchwork Times.
And you can go here for BOMs away Monday.
10 September 2012
Design Wall Monday - Sep 10, 2012
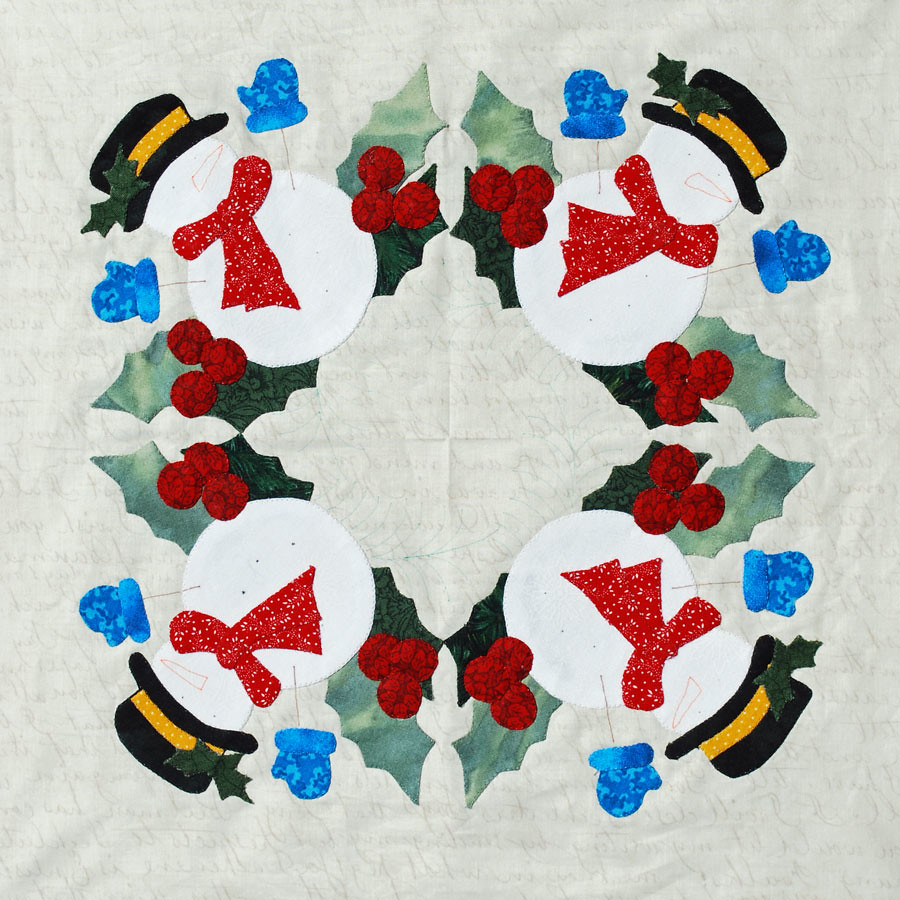
Here's another block in the Baltimore Christmas quilt. I am on a roll. Next block up is the snowman block. After that, I have 3 more plus the center and then the borders. I really am making some headway. I decided that if I ever want to get this quilt done, then I needed to work on this and this alone. Once all the applique is finished then I'll be able to move on to something else. Stay with me until then, please.
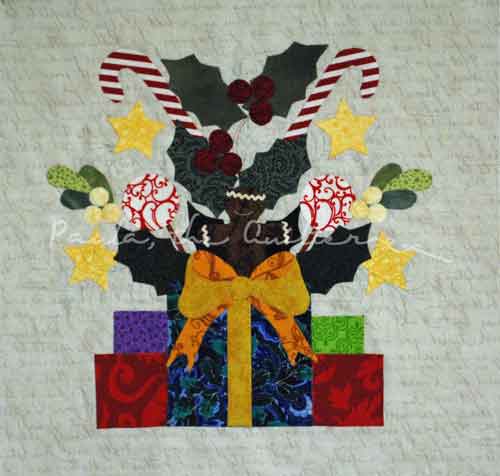
Sorry for the blurry photo. Don't know what happened here. I'll be adding the embellishments and embroidery after the quilting so right now it looks a bit strange with the gingerbread man's eyes and the shading on the mistletoe berries or even the pine boughs.
For more Design Walls please visit JudyL at Patchwork Times.
27 August 2012
Design Wall Monday - August 27, 2012
I've been busy on this BOM. The little quilting group I belong to is making this BOM. There are 14 of us doing this quilt. I am the only one doing machine applique, but that's all right. I was so far behind that I made it a goal to just work on this quilt alone. No dividing my time between projects. This way I can keep my machine set up with the proper thread, tension and needle. Once the prep work is done, and there is a lot of prep work, the stitching is speedy. If you are keeping count, this make block #7.
You can see the faint lines I've drawn for the embroidery. I won't be doing any of the embroidery or embellishment until after it is quilted. All the gingerbread men will need eyes and buttons and the pine boughs for most of the blocks will need to be stitched. There are other places here and there that I will be stitching too.
Subscribe to:
Posts (Atom)


