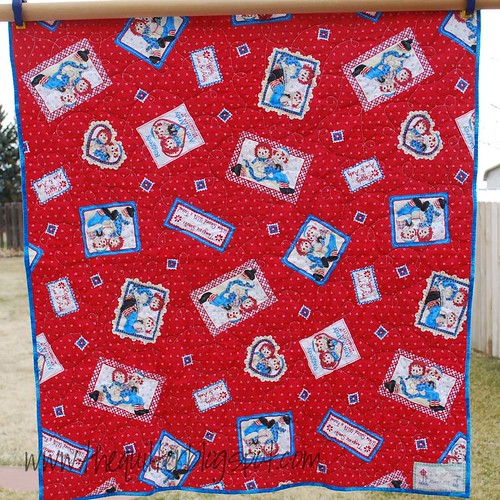
I had to stop the quilting progress on this little quilt. This is another donation quilt using up all the pre-cut 2.5" WOW squares from the scrap bin plus all the 2.5" squares I saved from someone's trash bin at a quilting retreat several years ago. I've gotten the center portion quilted with this:
And the two outer borders are ditch stitched, but then I came to a screeching halt. I realized that even though I wanted to do ribbon candy quilting in that inner border, I had never, as in NEVER, done ribbon candy. Time to practice. I have found that lined notebook paper is the perfect thing to prqactice with since I don't have to drawn the line.
What are you working on? It's a Linky Tuesday post!
Showing posts with label Design Wall Monday. Show all posts
06 October 2015
28 September 2015
Design Wall Monday: Sept 28, 2015
Whoa! I actually have a DWM post. It's not on the design wall but in my lap since I'm stitching on the binding. And, yes, I do my own machine quilting. Once I have it on, I'll show you the front. It is only a flannel jelly roll race, so it's nothing special.
Do you like my make-do binding clips?
I'm going to link with Judy's Design Wall Monday linky party.
Do you like my make-do binding clips?
I'm going to link with Judy's Design Wall Monday linky party.
22 June 2015
Update on Faithful Circle quilt
It sometimes seems like this is my forever project. I decided that to keep it from becoming an unfinished project, I should reconsider the size. I redrafted it and drastically cut the size. If I think it is too small once I get it together, I can always add more blocks, though.
I streamlined the sewing: I am putting all the colored pieces on and then I'll go back and add the triangles.
See that batch of hexagons (5" in size) to the left? That is all the blocks left to do in the new, smaller size. Yeah!
Update: I am adding the small triangles! All the colored pieces are sewn on!
04 May 2015
So out of character
I cut out this 'kit' a long time ago, so long ago I can't remember when. Have you ever done that? This is a free pattern that I found on the Blank Quilting site. I just checked and it has been pulled. It is a quilt designed by Janet Houts for Blank Quilting and the finished size is 58" x 70".
See that green square? And to the right of it that aged muslin square? I am going to use the green one because it is the same value. If you turn the photo to gray scale that muslin one jumps out and waves it arms. What is out of character for me is it is almost a monochrome color scheme.
Oh and do you see those big squares and rectangles? Would you believe that they are the same fabric? It is a hand-dyed fabric that had total dye saturation so I could use both sides of the fabric. Sweeeeet.
What's on your design wall?
13 April 2015
Design Wall Monday 4/13/15
Do you know what a poverty block is? When a quilter runs out of a fabric to make a block for a quilt and pieces together smaller bits of the fabric to make the block, the ensuing block is called a poverty block. Making do. I had to do this over the weekend.
I made a multitude of 4-patches over the weekend all from various white-on-white fabrics and one other pink/purple fabric.Can you see what happened? I ran out of fabric for that last block.
That is when I dug into the sewing room trash can and found these.
I wanted to use the purple because it was the darker of the two colors and I felt it would hide the seams better. There was enough of the two pieces of purple to piece together to make two 2.5" blocks. I then took apart one of the other purple 4-patches and substituted one of the poverty blocks into that block and made an entirely new 4-patch with the other poverty block. I moved the poverty blocks into the interior a bit so they wouldn't be as noticeable.
Okay. So I redid the design wall to make the checkerboard center a square rather than a rectangular shape. I like it much better as a square. You know that means I have to make ONE more poverty block, don't you? At least I have those pink pieces.
After that, the next step is to sew these 4-patch blocks into a large checkerboard. Can you believe that all that pink/purple is from one fabric?
What's on your design wall? Link to Patchwork Times DWM.
I made a multitude of 4-patches over the weekend all from various white-on-white fabrics and one other pink/purple fabric.Can you see what happened? I ran out of fabric for that last block.
That is when I dug into the sewing room trash can and found these.
I wanted to use the purple because it was the darker of the two colors and I felt it would hide the seams better. There was enough of the two pieces of purple to piece together to make two 2.5" blocks. I then took apart one of the other purple 4-patches and substituted one of the poverty blocks into that block and made an entirely new 4-patch with the other poverty block. I moved the poverty blocks into the interior a bit so they wouldn't be as noticeable.
Okay. So I redid the design wall to make the checkerboard center a square rather than a rectangular shape. I like it much better as a square. You know that means I have to make ONE more poverty block, don't you? At least I have those pink pieces.
After that, the next step is to sew these 4-patch blocks into a large checkerboard. Can you believe that all that pink/purple is from one fabric?
What's on your design wall? Link to Patchwork Times DWM.
23 February 2015
My Design Wall is full
It started innocently enough: it was going to be a Buckeye Beauty quilt. All the pieces were made and on the design wall. But I hesitated to sew it together. Something wasn't sitting well with me on it. Then I realized that there were just too many 'styles' of fabric trying to play together and it wasn't working. It came down off the wall and with the addition of a bit more white fabric, there is one child's quilt ready to sew together.
The pinwheels were put back onto the wall in three different groupings, and I think I will combine the two groupings on the left of the photo into one quilt. The twelve pinwheel blocks on the bottom will be another quilt.
What you don't see are the rest of the four patches. There's a plan, yes there is! But something has to come off the design wall to put the four patches up.
So out of one largish quilt, four or five smaller quilts will be made.
What's on your wall?
I'm linking to others at Patchwork Times.
The pinwheels were put back onto the wall in three different groupings, and I think I will combine the two groupings on the left of the photo into one quilt. The twelve pinwheel blocks on the bottom will be another quilt.
What you don't see are the rest of the four patches. There's a plan, yes there is! But something has to come off the design wall to put the four patches up.
So out of one largish quilt, four or five smaller quilts will be made.
What's on your wall?
I'm linking to others at Patchwork Times.
22 December 2014
Clara's Quilt
Clara's Quilt is done! This is another barter quilt and at the end of this post is the item I got in return. The quilt is a Double Four Patch that has the color melding in a spiral. I did the quilting on my Handi Quilter Sweet Sixteen.
This first photo is a close up of the quilting in one block. Doing ruler work, I first laid down straight lines in the white squares. I think this was the SLOWEST part of quilting this quilt. After that was done, I quilted back and forth lines from one square to the next.
There is a center formed on this quilt by the blocks, so I did a variation of the quilting pattern that I used elsewhere. The fern-like vine that you can see in the colored portion on the left in the above photo, was modified to look like a peacock feather in that middle section.
The outer border was quilted with a piano key design. See that white inner border? That is only 3/8" wide and it is pieced into the quilt. I just ditch quilted on each side of it. I used the tutorial here, go about 1/3 of the way down the page.
Here's the photo of the back again.
And here is the over-all quilt. It was a very windy day today (wind gusts up to 70mph!) and I NEEDED to get the photos taken this morning before handing the quilt over. So the only place that works is my bed. At least with the low light, the quilting shows up.
I traded the quilt for this bronze sculpture. He is life size and I move him around the house. I call him Kitty Gato.
Linking to Design Wall Monday.
This first photo is a close up of the quilting in one block. Doing ruler work, I first laid down straight lines in the white squares. I think this was the SLOWEST part of quilting this quilt. After that was done, I quilted back and forth lines from one square to the next.
There is a center formed on this quilt by the blocks, so I did a variation of the quilting pattern that I used elsewhere. The fern-like vine that you can see in the colored portion on the left in the above photo, was modified to look like a peacock feather in that middle section.
The outer border was quilted with a piano key design. See that white inner border? That is only 3/8" wide and it is pieced into the quilt. I just ditch quilted on each side of it. I used the tutorial here, go about 1/3 of the way down the page.
Here's the photo of the back again.
I traded the quilt for this bronze sculpture. He is life size and I move him around the house. I call him Kitty Gato.
Linking to Design Wall Monday.
01 December 2014
Design Wall Monday, December 1, 2014
There is nothing on the design wall at the moment since I have moved Clara's quilt to the machine. Yes, quilting has started! Currently I am doing the ditch stitching around the white squares using the VersaTool ruler from Handi Quilter. Ruler work is always slow but I'm about half way through the ditching. And then the fun of free motion quilting starts, woo hoo!
I'm linking up to JudyL at Patchwork Times for DWM.
20 October 2014
Blog Hopping Around The World
My friend, Juliann over at Lining Up My Stitches, asked me to join in on the Around The World Blog Hop. And I did!
What I am working on
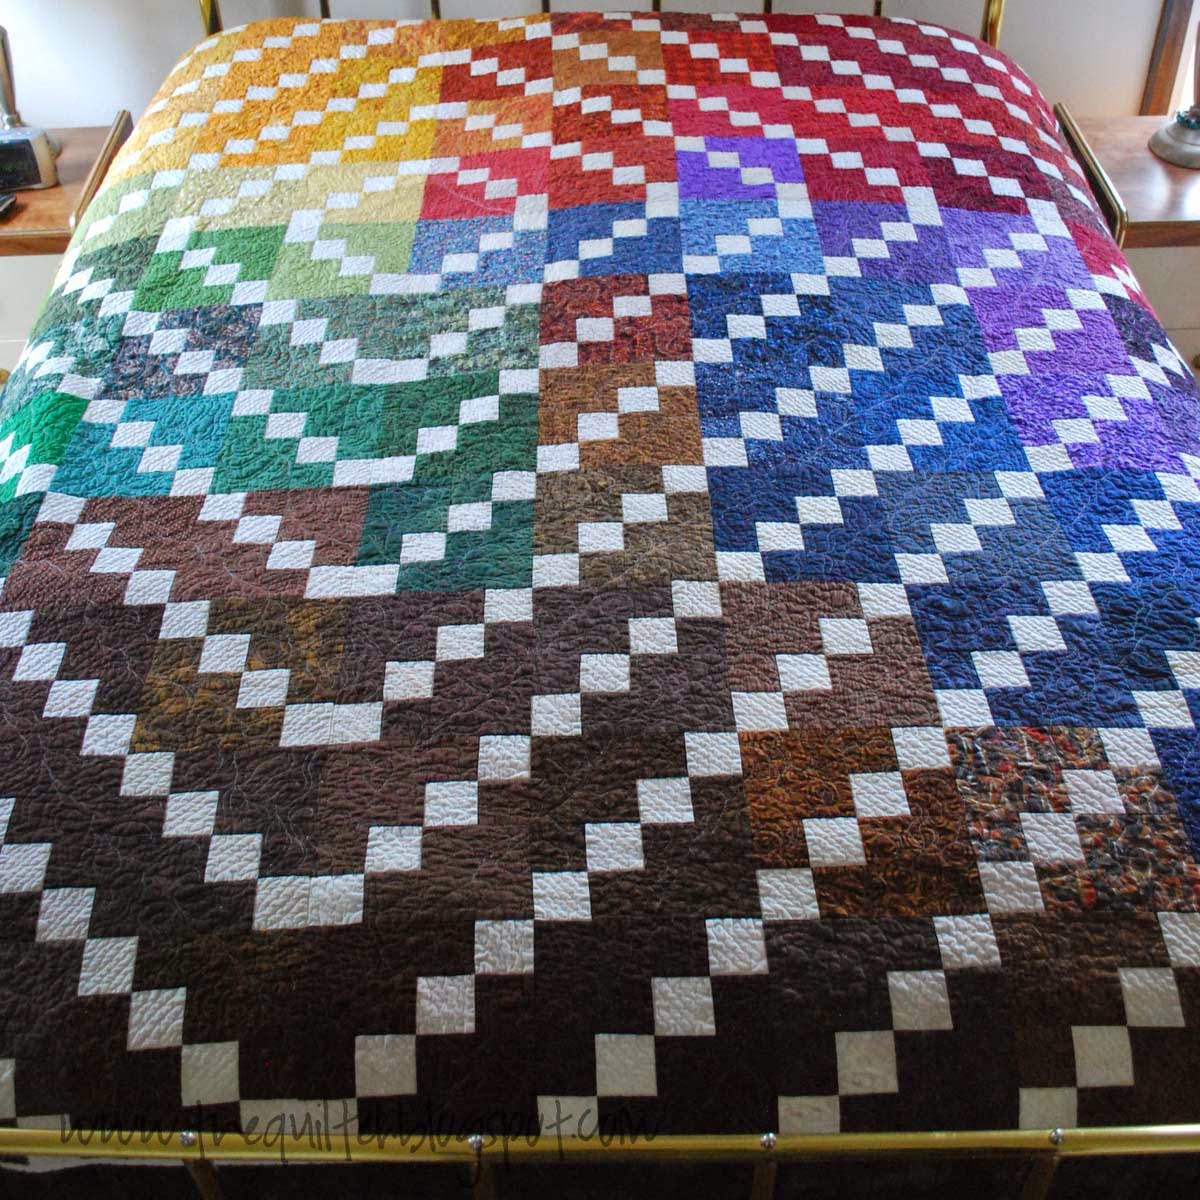
This is the second quilt I have sewn using the double four patch block and this setting. The color in this photo is a bit saturated; I can't seem to get good color on this quilt in a photo so when I shoot the final pic, I'll do it outside. You can see the other quilt here. This time I wanted to do a more controlled blocking with the both color and value. You can follow the progression from yellow to orange to red to purple to blue to brown to green. The values go from the lightest in the 'center' out to the darkest at the edges. This turned out exactly as I planned!
I thought the top was finished but it said 'no' I want more! And so I auditioned borders. I started by using a 2.5" strip for an inner border and a lovely batik I had in my stash for an outer border. The inner border just doesn't do anything for the quilt, does it?
So I move the outer border fabric in until there was only 1" showing. It is much better, but I still felt there was something better.
How about a quarter inch flange? Eureka! I really like this one and will probably use it.
How does my work differ from others?
I do love to work in color value. It is a time consuming endeavor, but, oh so fulfilling. The results can be spectacular when you get it right! The challenge of creating a beautiful object is so rewarding, especially if it is functionable.
How does my creating process work?
It starts on a whim and then I jump in 100%. First the idea comes to me and I start sketching. Once I get it a bit firmer I will create the quilt in Electric Quilt. I don't color it correctly because I love working with all kinds of different fabrics in a quilt and never know what is going to be used. This type of process does generate a lot of spare quilt parts, though. This quilt doesn't have a repeat of any of the colored fabrics so each block is different; it is almost, but not quite, a charm quilt. As I work on it, I let it talk to me about borders and quilting designs. Some quilts emphatically say they don't need a border and others, like this one tell you that it isn't finished yet. As I work on the piecing or applique I always ponder how I am going to quilt it. Now that I have a Handi Quilter Sweet Sixteen, I do all my own quilting. How am I going to quilt this one? I don't know yet, but there are several ideas bouncing around in my brain. This is another area that I audition. I have a large sheet of heavy grade vinyl that I pin over the top and then draw a quilting design on it using a dry erase marker so it is easy to erase.
When I am not quilting I am . . .
Knitting. I have knit since I was a child and have been knitting for over 50 years. I don't design knitted garments, but I could if I wanted to do so, but I leave the designing to others. I am a process knitter, I like the process and give away a lot of the things I knit.
I am going to link to Susan at Patchwork Reflections who will do a post on October 27. Please visit Susan's blog as she is a very good storyteller and takes great photos!
I am also going to link to JudyL at PatchworkTimes.com for Design Wall Monday.
What I am working on
This is the second quilt I have sewn using the double four patch block and this setting. The color in this photo is a bit saturated; I can't seem to get good color on this quilt in a photo so when I shoot the final pic, I'll do it outside. You can see the other quilt here. This time I wanted to do a more controlled blocking with the both color and value. You can follow the progression from yellow to orange to red to purple to blue to brown to green. The values go from the lightest in the 'center' out to the darkest at the edges. This turned out exactly as I planned!
I thought the top was finished but it said 'no' I want more! And so I auditioned borders. I started by using a 2.5" strip for an inner border and a lovely batik I had in my stash for an outer border. The inner border just doesn't do anything for the quilt, does it?
How does my work differ from others?
I do love to work in color value. It is a time consuming endeavor, but, oh so fulfilling. The results can be spectacular when you get it right! The challenge of creating a beautiful object is so rewarding, especially if it is functionable.
How does my creating process work?
It starts on a whim and then I jump in 100%. First the idea comes to me and I start sketching. Once I get it a bit firmer I will create the quilt in Electric Quilt. I don't color it correctly because I love working with all kinds of different fabrics in a quilt and never know what is going to be used. This type of process does generate a lot of spare quilt parts, though. This quilt doesn't have a repeat of any of the colored fabrics so each block is different; it is almost, but not quite, a charm quilt. As I work on it, I let it talk to me about borders and quilting designs. Some quilts emphatically say they don't need a border and others, like this one tell you that it isn't finished yet. As I work on the piecing or applique I always ponder how I am going to quilt it. Now that I have a Handi Quilter Sweet Sixteen, I do all my own quilting. How am I going to quilt this one? I don't know yet, but there are several ideas bouncing around in my brain. This is another area that I audition. I have a large sheet of heavy grade vinyl that I pin over the top and then draw a quilting design on it using a dry erase marker so it is easy to erase.
When I am not quilting I am . . .
Knitting. I have knit since I was a child and have been knitting for over 50 years. I don't design knitted garments, but I could if I wanted to do so, but I leave the designing to others. I am a process knitter, I like the process and give away a lot of the things I knit.
I am going to link to Susan at Patchwork Reflections who will do a post on October 27. Please visit Susan's blog as she is a very good storyteller and takes great photos!
I am also going to link to JudyL at PatchworkTimes.com for Design Wall Monday.
10 September 2014
Belated Design Wall Post, September 10, 2014
Clara's quilt is progressing nicely. This is the starting layout that I really like, but not with these blocks. Those blocks will finish at 8" and this layout just seems clunky with that size block. If the finished size of the blocks were smaller this would look so much better.
I am late to post this to design wall Monday, but here it is.
All the blocks came off the wall and were put back in this configuration. I need to tweek this a bit. I am not happy with the bulls eye effect so I am going to move the centralish area down and to the left just a bit. Plus the gold/yellows need to be feathered into the greens and reds. The golds and reds just seems to be too color blocked.
I am late to post this to design wall Monday, but here it is.
30 June 2014
Sewing on June 30, 2014
It started with this charm pack that was purchased several years ago on a shop hop. It has been marinating in the stash long enough.
There is plenty of the WOW fabric and with the addition of sashing (2" maybe?), I think it will make a passable child's quilt.
There are some units left over, see them on the left?, that can be used either on the back or in something else. I can always add them into the parts department.
I'm linking up with Judy L. for Design Wall Monday.
I had a plan to start, but it was a major fail and I ended up trashed some of the fabric squares. It broke my heart, but I re-thought it and came up with this one. Those blocks measure 8" finished. I can see that they need to be shuffled a bit more to break up that concentration of yellow in the upper right and the blue/greens in the lower right.
There are some units left over, see them on the left?, that can be used either on the back or in something else. I can always add them into the parts department.
I'm linking up with Judy L. for Design Wall Monday.
09 June 2014
Yes, sewing has happened
Are you sitting down? I actually pieced a quilt top! I know, right? Craftsy recently had a free pattern of a heart, Pieces of My Heart, that I thought would make a darling baby quilt. After downloading, I realized it was only 22"x22". So I made 4 and put them together with sashing.
I think something stretched when I put the blocks together. So I am going to unstitch the center sashing and redo it. I know, I know. Sometimes I leave things be, but I couldn't stop thinking about this mistake and so I need to fix it before it goes any further. It is not something that can be hidden in the quilting stitches. And I really like the way this turned out other than that center.
If you download this pattern make sure to read it before starting (famous last words!). I didn't and realized that the HST at the top of the heart aren't really HST. I took the first batch out and made proper HST to insert in place of the funky ones.
The Zig Zag quilt is a WIP. I still need to add borders to bring it up
to a good size. Both of these quilts will be about approximately 45" square.
I have a lot of this Riley Blake fabric left along with the background fabric. My background fabric is a soft dotted fabric that plays well with the more vibrant ones.
There is more inspiration at JudyL's blog.
If you download this pattern make sure to read it before starting (famous last words!). I didn't and realized that the HST at the top of the heart aren't really HST. I took the first batch out and made proper HST to insert in place of the funky ones.
I have a lot of this Riley Blake fabric left along with the background fabric. My background fabric is a soft dotted fabric that plays well with the more vibrant ones.
There is more inspiration at JudyL's blog.
Updated 6/10/2014: the hearts quilt is all fixed and in the pile of flimsies.
26 May 2014
Getting Better All The Time
I quilted the border in a free motion back and forth. It is very organic looking isn't it?
The center of the quilt was quilted in an all-over floral looking free motion motif.
The outer border is another floral motif.
The binding was machine applied using the flat felled foot for my sewing machine, I believe I have blogged about this method.
Size: 53x70
Signature thread: gray on the top and a variegated gold in the bobbin
28 April 2014
Shopping the Stash
I quilted yesterday. Yes, indeed. This top has been basted for a while and it was time to get it quilted. I used a free motion quilting motif I found on Amy Johnson's youtube channel as an all-over for the middle of this quilt. There are two borders left to quilt and I will show those when I get them finished. The two daisy prints are vintage Bill Blass fabrics from the 1990s I believe, but don't they look great with that gold? Shopping the stash, yeah!
Do you want more inspiration? Please visit Judy at Patchwork Times for more Design Wall Monday.
I am also linking up with Amy's Free Motion Quilting Adventures Free Motion Monday.
21 April 2014
Design Wall, April 21, 2014
In an effort to use stash, I have been cutting quilt kits for myself. I was doing just dandy until this quilt. Here's a link to the pattern. The larger pieces are 6.5 x 15.5 unfinished. The yellow is 2.5 x 15.5 and 2.5 x 7.5. The sashing is the dilemma! I need 2.25 yards and I don't have enough of anything in the stash to work. I thought the green would be good but then I lit on the purple. After viewing these photos, tho, I am back to the green.
Now here is the problem: I do not have enough of this COLOR to do the sashing. This is a dark green-blue on the color wheel and you can believe me when I say that I pulled every EVERY green I have to see if I can make it scrappy. I am not adverse to using different fabrics, even prints, as long as it is the same blue-green value.
And so, I do believe I will have to stop at the store and pick up the needed color. That purple is nice but there is already so much purple and pink. I do believe the green is the one.
For more inspiration visit Judy L.
Now here is the problem: I do not have enough of this COLOR to do the sashing. This is a dark green-blue on the color wheel and you can believe me when I say that I pulled every EVERY green I have to see if I can make it scrappy. I am not adverse to using different fabrics, even prints, as long as it is the same blue-green value.
And so, I do believe I will have to stop at the store and pick up the needed color. That purple is nice but there is already so much purple and pink. I do believe the green is the one.
For more inspiration visit Judy L.
14 April 2014
Still Nothing on the Wall
You would be wrong if you think that only knitting has been happening. Do you see those numbers? 433 liberated string blocks that measure 4.5 x 10". There are several layouts floating around my brain for these. Do I want to make a coin quilt? Or do I want to sub-cut these further into 60 degree diamonds for stars? These are a nice size for a piano key border or sashing. What to do, what to do. Something will come to mind, I'm sure.
I use these Kabnet Wax sheets. By cutting them approximately in half along the fold of the sheet, sewing string strips to them and then trimming them down to the required size, I end up with lots of these blocks. In fact, this session resulted in no more strings. What??! You read that correctly: I am currently out of scrappy strings.
But never fear! The basket was restocked with red, white and blue string that need to be sorted and trimmed down. Some are chunks rather than strings. These blocks will be 10x10, using the whole Kabnet Wax sheet.
I love this rice basket as it holds so many strings. It's size is quite deceptive.
And so, that is what is in my design drawer and basket, not the wall.
I use these Kabnet Wax sheets. By cutting them approximately in half along the fold of the sheet, sewing string strips to them and then trimming them down to the required size, I end up with lots of these blocks. In fact, this session resulted in no more strings. What??! You read that correctly: I am currently out of scrappy strings.
But never fear! The basket was restocked with red, white and blue string that need to be sorted and trimmed down. Some are chunks rather than strings. These blocks will be 10x10, using the whole Kabnet Wax sheet.
I love this rice basket as it holds so many strings. It's size is quite deceptive.
And so, that is what is in my design drawer and basket, not the wall.
07 April 2014
Two Baby Quilts
I have two completed projects as there is nothing on the design wall today.
Since the Handi Quilter Sweet Sixteen entered Casa del Quilter there has been a lot of quilting going on; a lot. The simplest form of practice is to take two lengths of fabric and sandwich them together and then quilt. Don't you agree? Here are two examples of just such a practice.
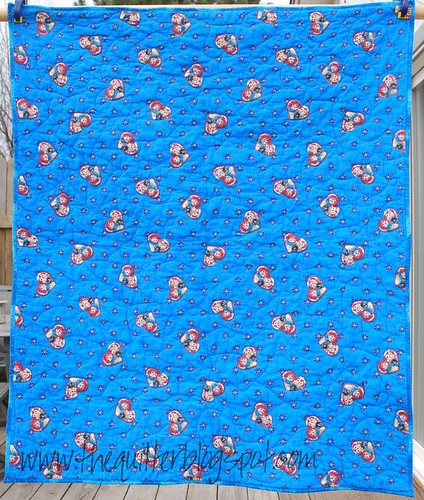
The first baby quilt up is flannel on one side and 100% cotton on the other. Quilted in an all over free motion and Mettler Quilting 40/3 thread. 100% medium loft poly batting.
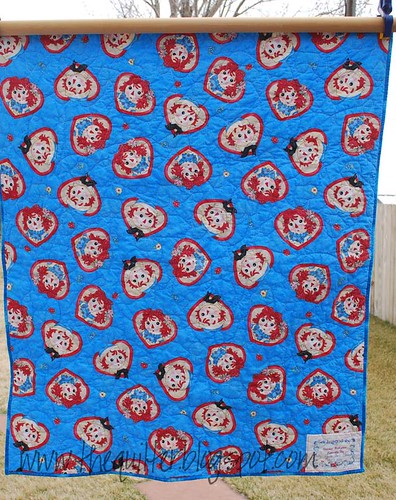
Next up is another baby quilt with flannel on one side and 100% cotton on the other. It, too, is quilted in an all over free motion and Mettler Quilting 40/3 thread. 100% medium loft poly batting.
I am not only using up largish hunks of fabric but also chunks of batting, preprinted labels and various spools of thread. The blue fabric I used in my sweatshirt jacket was a perfect match and worked for the binding.
If you want to see more design walls, please visit Judy's blog at Patchwork Times.
Since the Handi Quilter Sweet Sixteen entered Casa del Quilter there has been a lot of quilting going on; a lot. The simplest form of practice is to take two lengths of fabric and sandwich them together and then quilt. Don't you agree? Here are two examples of just such a practice.
The first baby quilt up is flannel on one side and 100% cotton on the other. Quilted in an all over free motion and Mettler Quilting 40/3 thread. 100% medium loft poly batting.
Next up is another baby quilt with flannel on one side and 100% cotton on the other. It, too, is quilted in an all over free motion and Mettler Quilting 40/3 thread. 100% medium loft poly batting.
I am not only using up largish hunks of fabric but also chunks of batting, preprinted labels and various spools of thread. The blue fabric I used in my sweatshirt jacket was a perfect match and worked for the binding.
If you want to see more design walls, please visit Judy's blog at Patchwork Times.
10 March 2014
Donation Quilts
This is a donation quilt that I finally finished! All those black and white checks made my eyes twitch. The pattern is from Mary Quilts called Quick Strippie. It really is a quick quilt to make. This was the first time I used this tutorial for machine binding with a flat fell foot for my sewing machine. Let's just say, that I need practice. Quilted with a wishbone pattern on my HQS16 using Signature thread.
This was a panel that I used for a simple allover clam shell quilting design. I used a half circle ruler to do the clam shell and found out that my HQS16 was sitting about 1/4" higher than the surrounding table. This made for some jerky curves. I have since fixed the problem by removing the rubber feet on the machine and installing some silicone bumpers to bring it to the right height. I used a Guterman size 40 quilting thread which was probably a mistake because it overpowers the sweet design on the panel.But done is done and the quilting practice is worth it because even though the curves aren't smooth, the stitches themselves are fairly consistent.
Both of these quilts are donation quilts and will go to deserving homes.
Update: The blue panel uses a poly batting. That is why it is so puffy looking.
Here you can see more design walls.
27 January 2014
More of the same, but soon...
I have been sewing along on the duvet cover. Remember when it looked like this?
And then like this?
And then this?
When I stopped sewing last evening, it looked like this:
One more seam to sew on the Bernina and then three seams to overcast on the serger. Pop it into the washing machine and then the dryer. Stuff the comforter in and put it on the bed! So close to the finish.
What's on your wall?
20 January 2014
Design Wall Monday, January 20, 2014
What is on my design wall? A very big duvet cover. My wall is 8'x8' and these flannel blocks cover the whole thing plus a bit more wall (see the blue painter's tape on the left?). The finished cover will be 88x104 which is 2 inches smaller all around.
This really needs some rearranging! I was able to get all the blocks up on the wall, but realized that I was two half blocks short. And I really don't like all the pine cone fabric blocks (featured here in this post), it is almost too many. But, there are several more flannels in the bin that I can cut into blocks and substitute here and there. I don't know if I want to go as dark as that block on the right; there are only two of those blocks and they can come out and be replaced with another green.
In the left foreground you can see my HQS16 and just behind it on the table is the next quilt to be quilting. Several weeks ago I accepted a top from a lady in my quilting group to quilt. It has been weighting heavy on my mind that I haven't done anything to it, so yesterday I got it basted and it will be quilted soon.
In fact, yesterday I pin basted three more baby quilts. Many many moons ago I purchased several kits made with Daisy Kingdom fabrics (remember that fabric line) and I found them again yesterday morning when straightening up the sewing room. They have aged long enough and need to be out of this house, so I got them all pin basted and added to the pile to quilt, which, incidentally, now has ten quilts in it. Must quilt.
The good thing about getting all these flannel blocks onto the wall, is that now I can look at them and come up with a pleasing design. When I quilt at the HQS16, I like to glance away now and then to rest my eyes and I can look at this when I do it.
What's on your design wall?
Visit JudyL at Patchwork Times to see what others have on their design walls..
Subscribe to:
Posts (Atom)